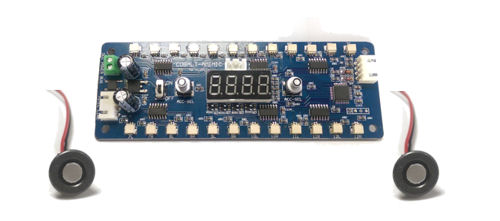

 JAMES HICKMAN introduces the simple Alpha Mimic system, for creating mimic panels and diagrams with ease.
This is an easy one to answer. Alpha Mimic is a simple, solderless, plug-and-play mimic panel controller.

In one of the first issues of RIGHT LINES I wrote about ""Building a Mimic Panel"" for your layout using the change over switches of a GMC-PM1 Point Motor with Built-in Switch. Although not difficult to do, it does require soldering and a fair amount of cable. DCC Concepts have looked at this issue and created Alpha Mimic with this in mind. This unique product allows you to create an impressive mimic panel with ease, and with just two wires to your layout, incredibly easy to wire up.
Although the Alpha Mimic is primarily designed for DCC layouts - analogue users never fear, the unit can be used on your analogue layouts with the addition of a forthcoming piece of kit from DCC Concepts.
There are currently 6 items in the DCC Concepts Alpha Mimic Range; three start packs and three add-on packs. These are outlined below:
A demonstration of the 3 colour options available. (Click image to view larger version).
Whichever colour option you go for, all the wiring, what little there is of it, is the same. The first stage is to create the mimic panel itself. Within the instructions of the Mimic starter packs there is a nice little How-To guide on creating your own panel. There are also details of a pack of digital track diagram symbols available to download from DCC Concepts' website to enable you to create a realistic diagram.
As I previously stated, the wiring is incredibly simple. Each of the provided LEDs is pre-wired into bezels for easy mounting. Once they are installed the wires with pre-attached plugs are connected to the sockets on the Mimic control board. There are twenty-four outputs on the board (twelve pairs of six). if you wish to add more LEDs to the diagram, you can add more from the add-on packs, with the splitter cables provided in them.
Next you need power. This is achieved by connecting two wires from the Alpha Mimic to the relevant bus wire. If you have one bus (running both your accessories and locomotives) connect to this. If you have one bus for your locomotives and another for your accessories, connect the Alpha Mimic to the accessory bus.
And that's it, it really is that simple! If you wish to show more accessories on your panel, purchase an additional starter pack. The second board connects to the first via the supplied white cable, so there is no need to add any additional wires for the second board. All you will need to do is program the second board, via the on-board switches, to tell it that it is the second board in the sequence. Regardless of how many boards you have daisy-chained together, programming is easy and semi-automatic. When you set the first address, it cascades from that number down to every LED on the board.
Once this is all connected the lights will change when a point is thrown. Just remember to have your motors programmed to the same number as the LEDs that are changing, or else there will be a lot of confusion!
The Alpha Mimic as it would be wired to a Gaugemaster Prodigy Advance. (Click image to view larger version).
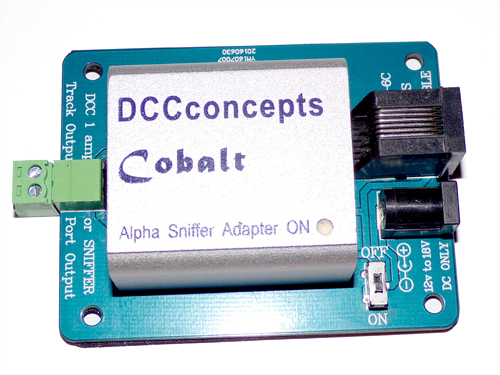
Although the Alpha Mimic has been designed for DCC operation, that doesn't mean analogue users have been left out. In my previous article on the " Cobalt Alpha " System I showed you how to create an accessory bus for your analogue layout. This has been made even easier for your analogue users with the DCDCD-SNX Cobalt Alpha Direct DCC Interface.

The DCDCD-SNX Cobalt Alpha Direct DCC Interface.
This little unit enables you to create a DCC accessory bus for you layout without any hassle. The diagram below shows how it integrates with the Cobalt Alpha 12-Way integrated switch to control your accessories.
(Click image to view larger version).
You can even use the Cobalt Alpha main unit and toggle switches to control your points and still have an accessory bus.
(Click image to view larger version).
Well there we have it, a quick look into the simple world of Alpha Mimic. Keep an eye on this range as in the coming months DCC Concepts will be releasing a new aspect of Alpha Mimic: Ground Signals. These will connect and operate in the same way as the Alpha Mimic as described above, but instead of lights on a control panel you will be activating real working ground signals on your layout.