
 STUART JORDAN shows how to finish this versatile kit.
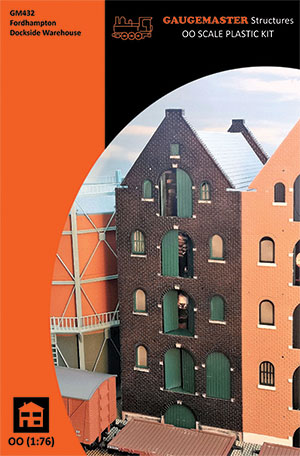
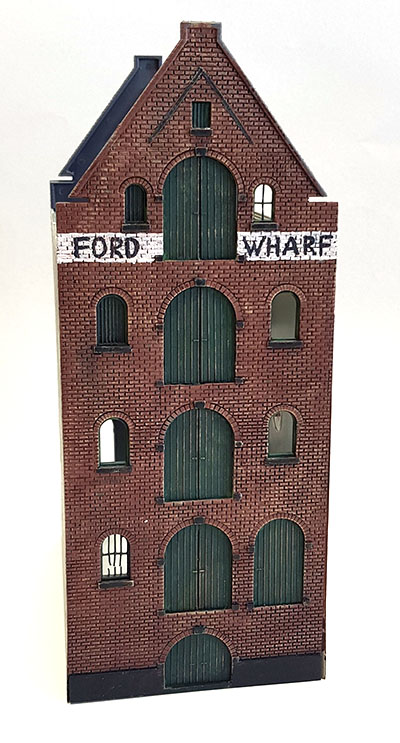
The OO Scale GM432 Fordhampton Dockside Warehouse kit is very versatile - buildings like this stood at every busy port in Great Britain from the time of the Industrial Revolution onwards. These tall warehouses would be vital for the intermodal transfer of goods either to or from ocean-going vessels to either railway wagons or canal barges. The explosion of international trade led to the ports of London, Bristol, and Liverpool becoming some of the busiest trade hubs in the world.

This kit represents a typical multi-storey warehouse and multiple kits can be built adjacent to each other to produce a row. To begin, we start with a bit of a disclaimer - I'm not going to show you how to completely build this kit. I am personally more interested in how the kit can be painted to a reasonable finish. As you can see, the kit contains the usual selection of pre-coloured sprues and also includes a sheet of interior decoration should you wish to build the kit with the doors open.
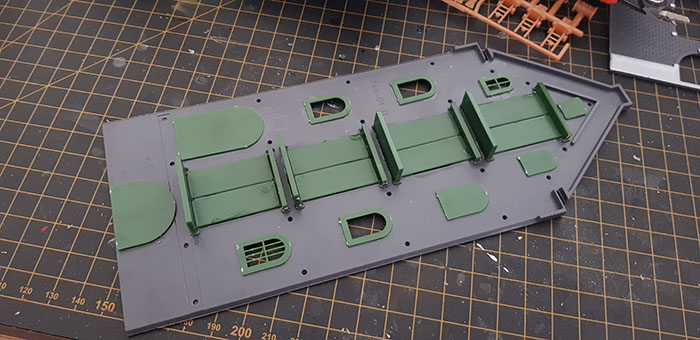
The first couple of steps guides you through adding the doors and window frames to the front and back of the building. For the sake of this exercise, I am only going to put one side together, but you can see that it is a fairly simple affair.
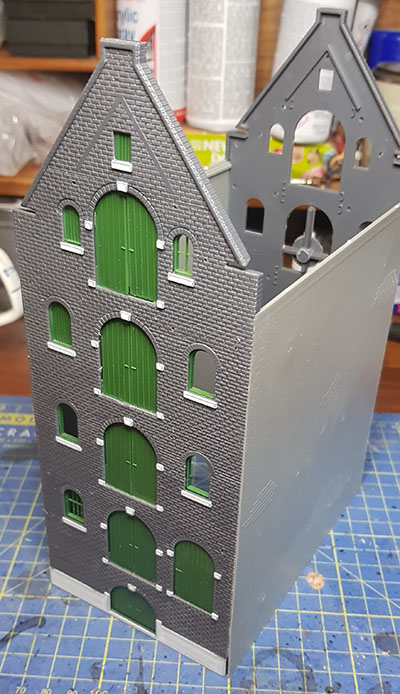
The four walls have been fitted together. While waiting for this to dry, I've moved from the temporary workspace of the GM575 Modelling Workstation to the permanent modelling desk. The face of the building is now ready to be painted.
First, we start with a basecoat of a brick coloured acrylic paint. This was just slightly watered down and then applied with a large brush.
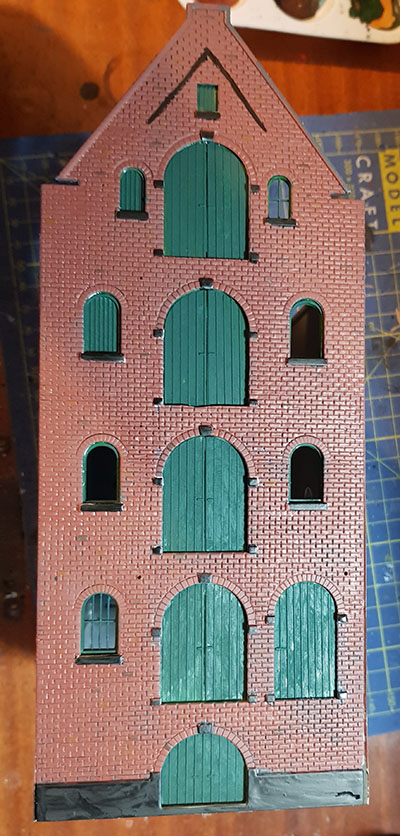
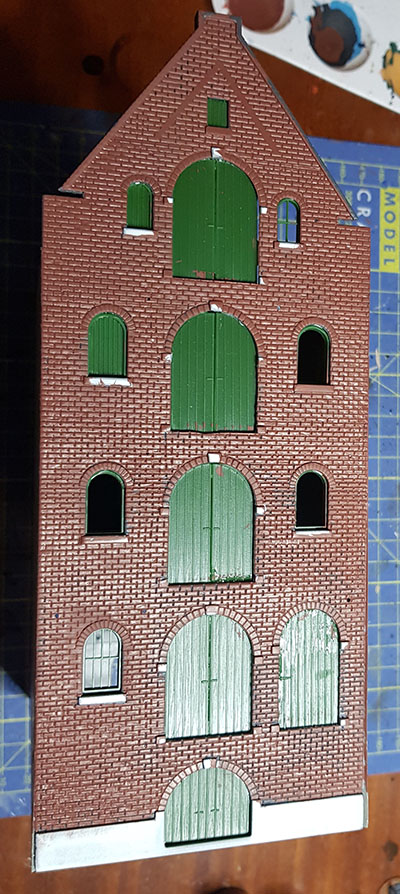
The doors and windowsills have been painted green, with the previously pre-painted sills and blocks filled in with black. Odd bricks here and there have been painted in two other shades of brown, to break up the main brick colour.
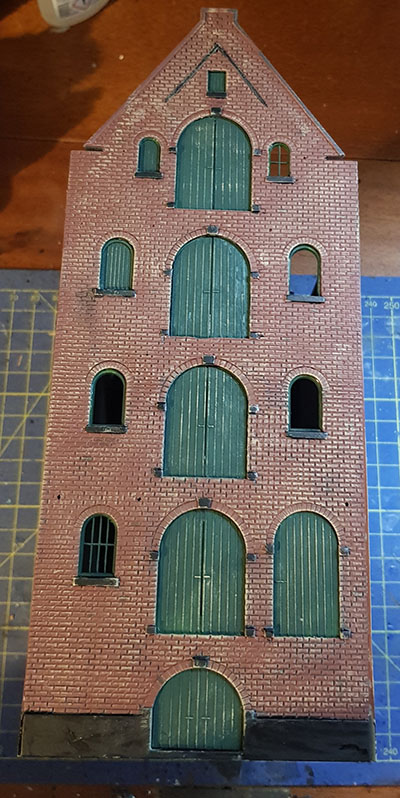
The whole face of the model has now been drybrushed with a beige-brown colour, to bring out the details. Drybrushing is acheived by loading a brush with paint, before wiping it on paper or kitchen roll until most of the paint has come off the brush. The brush is then lightly run over the detail on the model, which is picked out as a highlight. Don't be afraid of mistakes or stray brushes when working on buildings. Such mistakes can help with colour variation which is ultimately what adds realism. If you look at the doorway third up on the left, you can see a smudge of black below it. This was where I jerked my hand while going over the windowsill in black. I wiped the paint with my finger and smudged it into the brickwork. No problem!
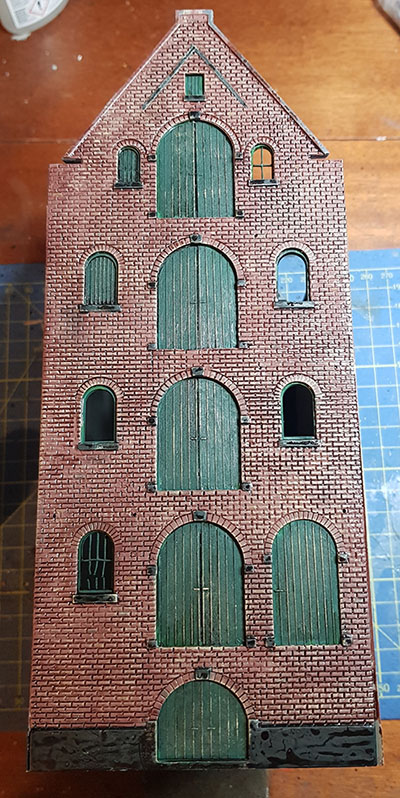
To add more contrast between the brickwork, I've now added a dark brown wash to the whole frontage. For this, you can either use watered down acrylic paint (but be careful the pigment doesn't split from the paint), or what I have used here which is a dark brown ink available from stationers, art shops etc. Although it has dried, there are still some apparent shiny parts where the ink has coalesced. This isn't a problem as the building will be given a coat of matt varnish when completed. It's at this point that I realised that I had broken the bars in the lower window. Luckily this actually looks good and in keeping of it being an older building!
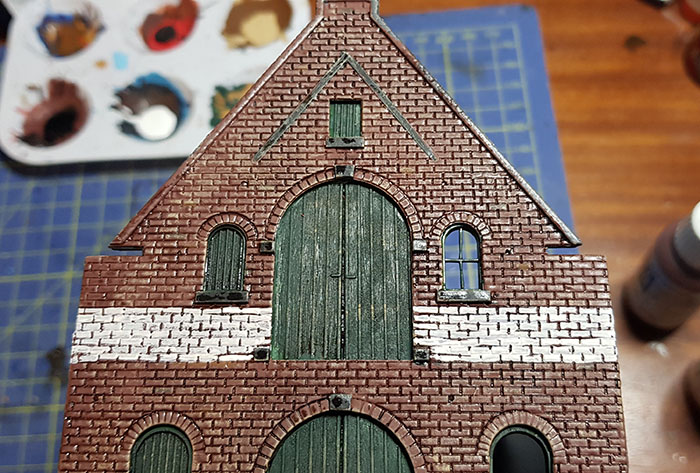
Now we are going to add a common feature to our warehouse - the name of the dock. This was usually painted in black on a white band located high up on the building so it could be easily identified by incoming ships.
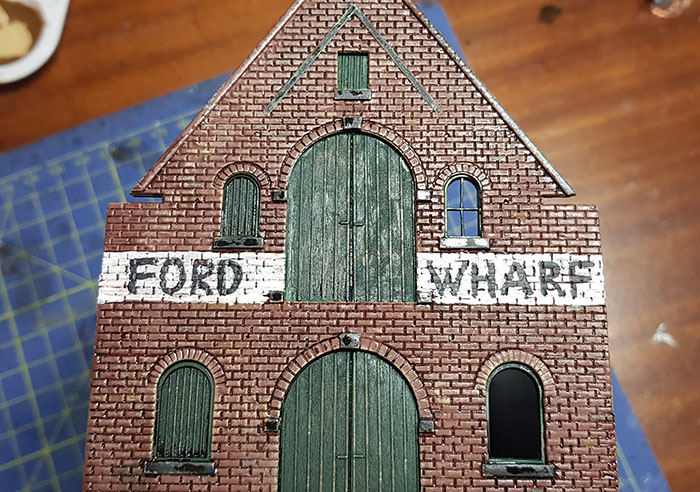
I've now carefully painted in the letters, ensuring that they are of uniform size and fit the space available. A bit of brick counting a quick calculation told me that the letters in 'WHARF' had to be no more than two bricks wide for the word to fit! I started with the 'A' to ensure that it was central. This sounds silly, but I also wrote down the words 'FORD WHARF' on a bit of paper on the desk next to me, so I wouldn't make any spelling mistakes... You could use a stencil or premade letters if you prefer.
The finished face after a coat of spray matt varnish. This dulls down the paint job and makes it look more natural. More weathering could be added if desired, but once the kit is finished this is more than ready to be added to the layout.