
 MARK HOLLAND takes us through building and installing the Faller Hot Air Balloon kit.
While thinking about a new point of interest for our shop layout, a hot air balloon was hit upon as a good idea and something that would also add some height to the area. As it happens Faller produces Hot Air Balloon kits in both HO/OO and N, which of course is a total coincidence. (We all know Mark has been dying to build this kit for a while! - Ed)
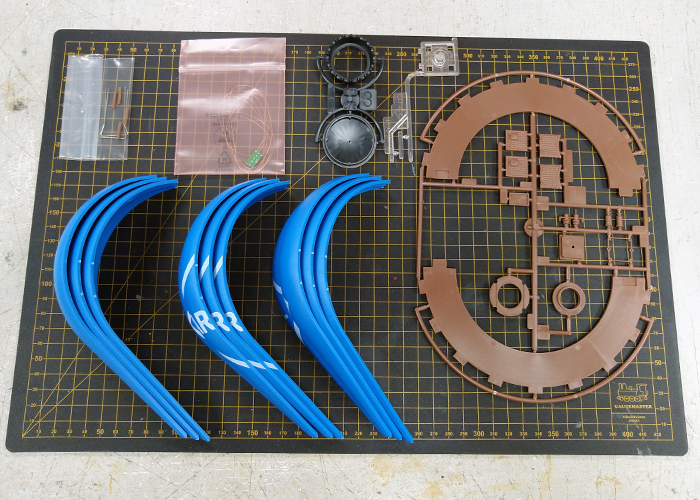
The above shows the contents of the box. Not a complex kit, but a big one. I’m making the HO/OO FA131001 version here.
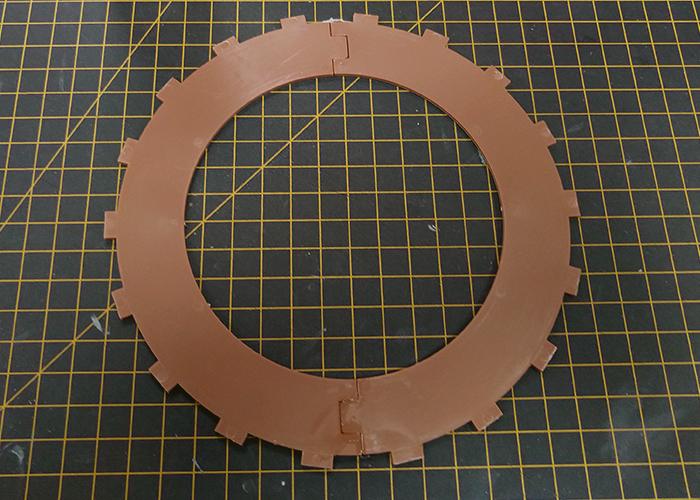
The first step is to make the balloon internal support ring. This comes in two halves and needs plenty of time for the glue to dry as this part is critical to making the balloon shape correct. So while that’s happening, onto the next step.
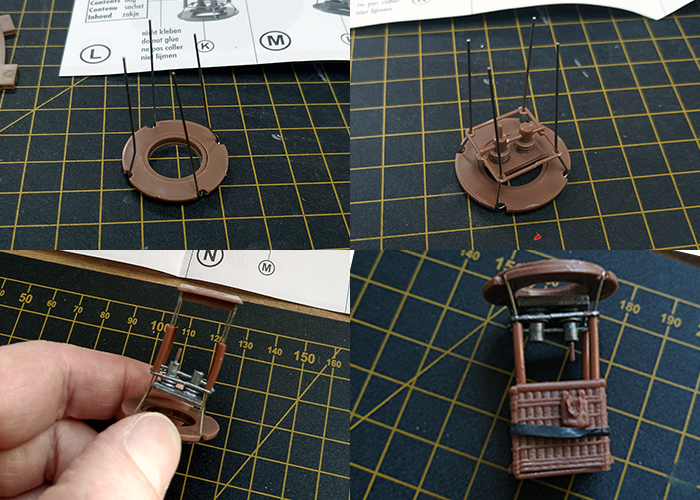
This step is the assembly of the basket and burner stage. It can be a little fiddly as the wire support legs need to be superglued in the basket base, although if you do a dry run before gluing this should make getting it together easier. This is also the best time to paint the burner arrangement.
This kit comes with a LED unit to go on top of the burner which gives the flame effect when it is connected to a 9- 16 V supply. The LED board needs the supplied clear rod gluing onto it so that the effect is directed up in to the balloon. The best glue to use is a fast curing superglue, the same goes when you are attaching the LED board to the burner top.
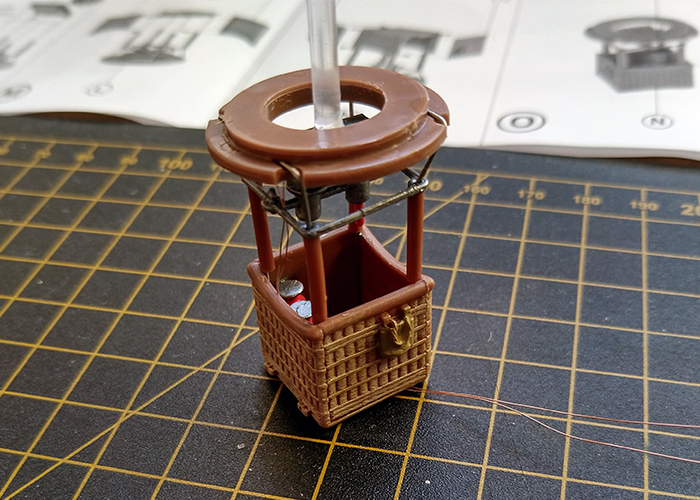
With the basket all assembled and given a gentle covering of a light brown paint the detail becomes more prominent. Now back to the balloon.
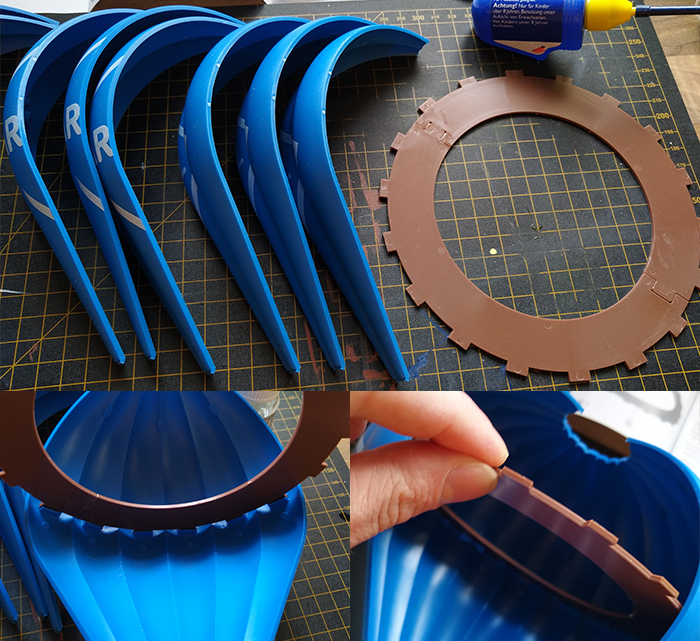
Once the glue on the balloon support ring is completely dry and firm (I left it overnight to make sure) the balloon sections need to be assembled in the correct order so that the logo printed on it line up correctly. Glue on the internal tabs and the down the butting sides of the pieces give a nice firm balloon, although it won’t be secure until the last piece goes in.
Make sure the top and bottom holes are completely circular before putting some elastic bands round the balloon to hold it while it dries.

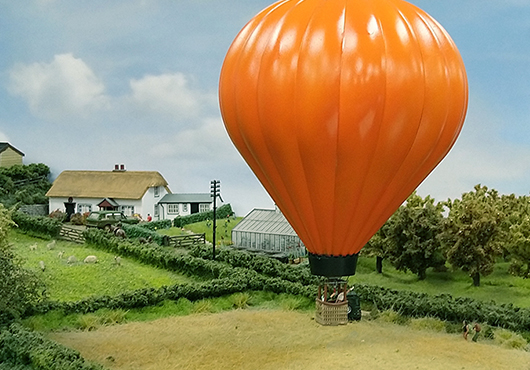
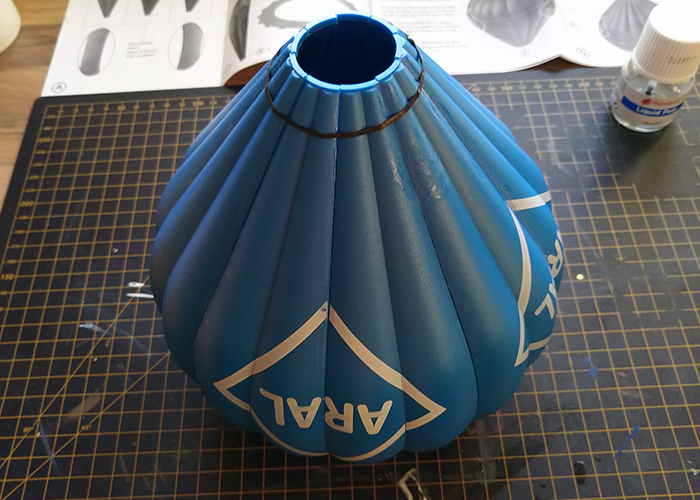
Now you will notice a change of colour from the previous picture. I decided to go a bit different than the standard kit. As most of you will be aware, orange is one of our company colours, so with this in mind a spray can was selected and, after a white undercoat was applied to cover the original blue, the orange was sprayed on in several light coats.
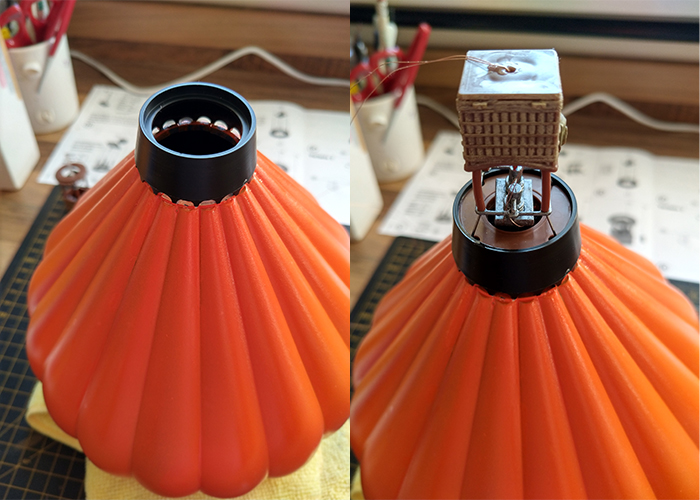
Once the paint has fully dried, the basket support ring can be glued into position and then the basket assembly glued onto that. As you can see in the picture, the wires for the LED come out through the bottom of the basket via a hole in the base.
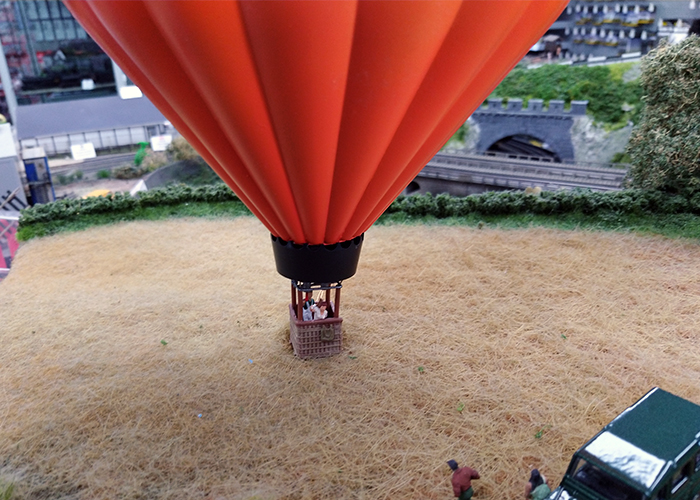
We are ready for take-off. To bring the whole thing to life a bit more, a couple of appropriately posed figures were added into the basket to really set the scene.
A nice, interesting kit of something we all see from time to time making their way quietly overhead and a good kit to add a bit of interest or a focal point to any layout. You could even go to town and have several balloons all painted differently to represent a balloon gathering or festival. (If you want some further inspiration, have a look at the Bristol International Balloon Fiesta - Ed)

The finished model can be seen taking off from the field on our shop layout, and if you're in the area, why not pop in and have a look.