
Through the advance of digital technology in the model railway world, locomotives factory fitted with sound on board have found their way onto many of our well-loved layouts. We gladly listen to the sound of the 'chuffs' of a steam locomotive or the 'whirring' of a diesel engine, but there is always one thing missing to finish the scene; the sounds of the rest of the world. No matter how close you are to a locomotive in reality, there will always be something else you can here, and hey presto... now you can on your layouts too!

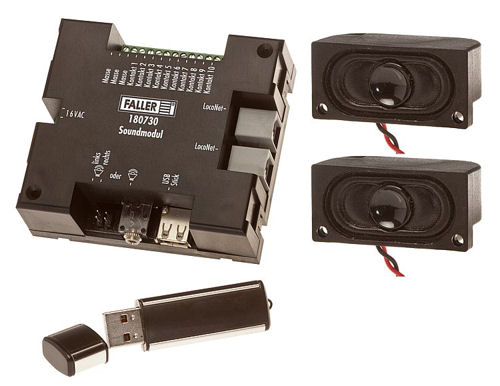
The Faller Sound Module is a programmable module separate from your controller, so can be used by both analogue and digital modellers alike, and is very easily set up.
So what do you get? Included in the box is the following:
This doesn't seem like much for such a seemingly complicated piece of kit, and it isn't. The beauty of this module is that it is fully customisable without the need of knowledge of electrical or audio systems. The clever part is the USB memory stick that is included. This stick contains all your software required for programming and setting up the module, and no, that’s not tricky either!
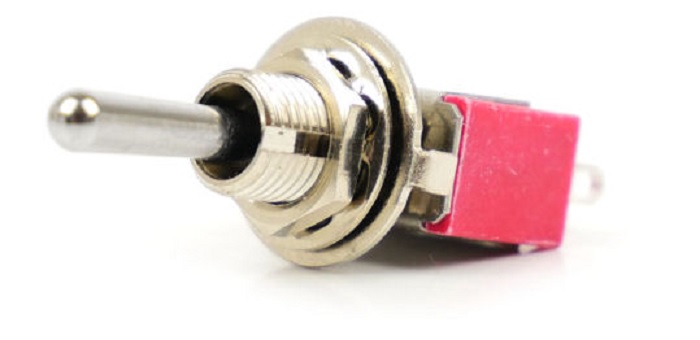
Again this is easy. The unit requires two wires from a 16v AC power supply. This can be found on the back of most controllers, alternatively the Gaugemaster GMC-WM1 transformer will do the trick. I would also recommend installing an On/Off switch to allow you to turn the unit on and off without having to either unplug or unwire it. The GM503 SPST Toggle Switch or the GM507 SPST Mini Toggle Switch are perfect for this.
The connection of the speakers is by way of two push-on plugs, one for each speaker. The cable on the supplied speakers gives you enough for a localised impression of sound, but for larger layouts there is an added bonus. The unit also comes fitted with a 3.5mm stereo jack allowing the majority of over-the-counter speakers to also be connected. This is especially handy for those of you with old computer speakers as these usually also have a volume adjustment control, allowing the volume to be adjusted without needing to reprogram. The speakers included are not to be sniffed at however, as they are more powerful than those fitted to a standard laptop.
The only other connections you need to make are optional. The unit is equipped with 10 inputs that run along one side of it. These, when activated, tell the unit which sounds to play. The input method can be as varied as you like. The unit is capable of activating from the following switches as well as many others:

The GM510 SPDT Mini Toggle Passing (Momentary) Contact Switch. (Handy if you have some the BPGM510 bulk pack left over from installing your point motors!)

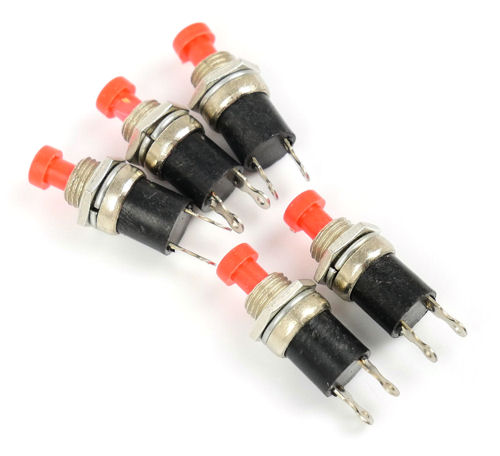
The GM513 – GM518 Push to Make Switches (Most commonly used for this purpose, push the button and the sound plays)

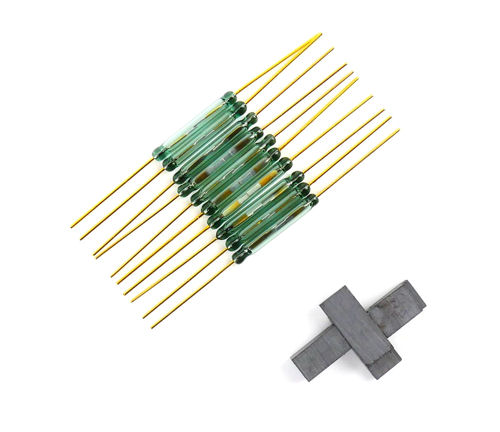
The GM99 Reed Switch (Useful for activating sounds with locomotives / vehicles fitted with magnets)
The reed switches shown above are a brilliant way of activating at least some of the sounds on the module. If you are already using reed switches on your layout or DCC Concepts Powerbase, you will already have magnets fitted to your locomotives, and if you are using the Faller Car System, your moving vehicles can activate them too. This type of activation would be effective if the sounds being activated were related to the movement of the locomotives or vehicles, for example:
You may wish to activate the unit by way of reed switch and magnet attached to a loco. This would be handy for non-sound-fitted locomotives.
Scenario 1: as a locomotive enters a tunnel, it activates a whistle sound on the unit.
Scenario 2: as a locomotive passes a group of trainspotters, you could activate the sound of cameras clicking.
As the Faller road vehicles move using a magnet running along an embedded guide, it is easy to add a reed switch in too.
Scenario 1: as the vehicle is moving, it passes the driver's mother and gives her a little toot of his horn in acknowledgement.
Scenario 2: as a bus is leaving its bus stop, you could have the unit activate and hear the conductor announcing the next stop, do this at every bus stop and you can have him shout out the next stop of the full route.
The unit also comes with two Loco-Net ports allowing control of the unit in the usual Loco-Net way.
Well, actually, you don’t. Out of the box, the unit is ready to go, simply connect it us as mentioned above. Turn it on, and your layout will come alive with sound. There is a downside to this though. You are stuck with the pre-loaded sounds associated with each command as well as the high pitched background sounds of some very chirpy birds, not very helpful for those modelling Victoria Station in the middle of built-up intercity London.
You would like to vary the sounds? This is where the computer software comes in. The USB memory stick included comes loaded with software that allows you to customise the sounds you hear and how and when you hear them. As previously mentioned, there are contacts that you can connect switches to that will enable you to activated the sounds. That is only one part of it however.
The unit is also capable of running a background track or tracks that will loop indefinitely. This is useful for the general sounds of birds chirping, cows mooing or the general hustle and bustle of everyday life. This will play throughout the on time of the unit, only stopping with the activation of another command.
Aside from playing sounds in an indefinite loop, you can also have sounds playing now and again. Stricly speaking, these sounds, like the background sounds, loop as well but are heard less frequently. All of this can be programmed and activated with the unit. For full details on programming the unit, see the instruction manual that comes with the unit.
Alternatively, if you are yet to purchase a Sound Module, but want to know what’s involved first, you can access the instruction manuals in either German or English.
Note: The software which is installed onto the USB stick is in German so it is a good idea to keep a copy of the instructions to hand for reference.
You don’t need to! As well as having the installation software on the USB Memory stick, you also have a library of over 100 sounds installed at no extra cost. These range from sounds of locomotives, to birds tweeting, from dogs barking to church bells. To use these sounds install the software, program them in, and away you go.
That’s not a problem either. Because the sounds are set up and programmed through a PC and USB Memory Stick, adding sounds is easy as well. Without going into too much depth on file types and audio manipulation, the easiest way is to copy and paste your sound files onto the memory stick. These files need to be in MP3 format to work. These could be sounds you have downloaded, or ones you have recorded yourself.
If you, like me, enjoy messing around and experimenting with sound, you may want to add some glitz and glamour to your sound recordings. Reverberations are a common sound to hear as a train rattles past, as are station announcements. These can be a bit hard to recreate, however with some time effort and patience, a decent quality sound file can be obtained. There are numerous free and paid for software packages out there that enable you to change and edit sounds so do not feel afraid to give it a try. Personally, I use free, open source, cross-platform audio software called "Audacity" for editing my sound files as this is a simple, effective and easy to use program.
I hope this insight has wetted your appetite for added sound, and if you have any further questions please feel free to contact us here at Gaugemaster. This has been a very quick introduction to the unit as there is infinite possibilities on how to use this with your layout, it is impossible to name them all. If you would like further information on all that the unit can do; have a read through the instruction manual by clicking the link further up the page.
I hope also, in the coming months, I will be able to revisit this unit in a later article, as well as some of the exciting other exciting products in the world of model sound.