
 MARTIN LOVELL finishs up detailing the Fordhampton Service Station.


Having lit up the petrol pump canopy in the last article, I next decided to model the interior of the garage and installing lighting as well.
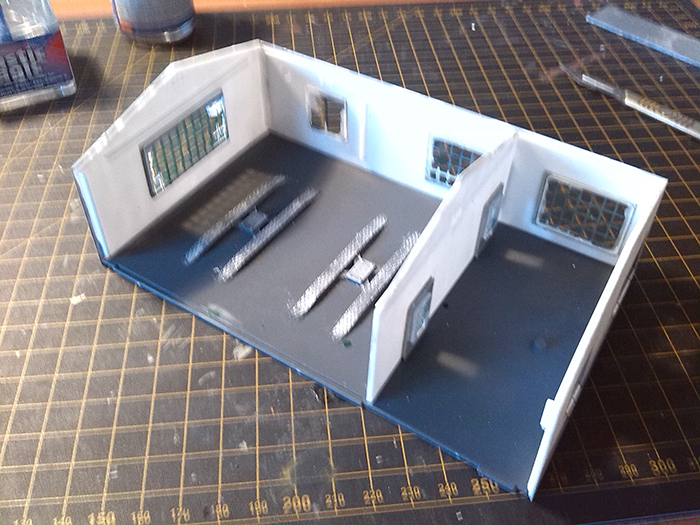
Having started on the garage structure as per the instructions, I left off the front wall in order to permit easy access to the work area.
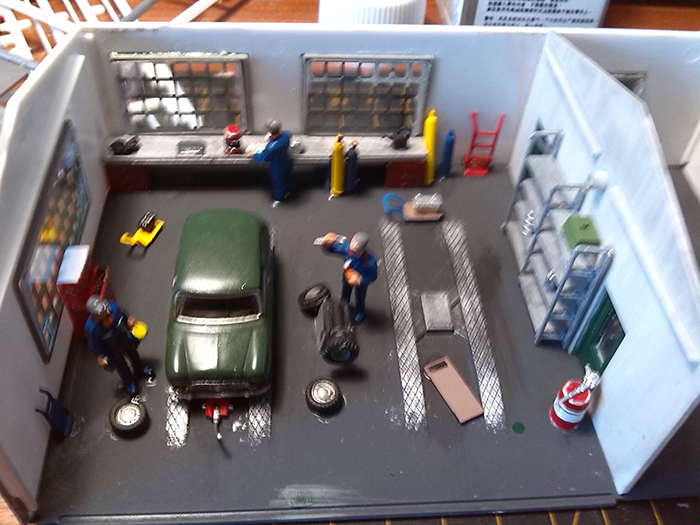
For the accessories, apart from the ones provided in the kit, I decided to use the Noch Garage Accessory Set, (N14815, which provides a good selection of work tools and bits. These were then placed on the racks, benches, and floor, and an Austin Mini from Oxford Diecast is positioned, (Incidentally, my first car!) Having its front wheels changed. The figures are from Bachmann set of Traction Maintenance Depot Workers (B36-051).
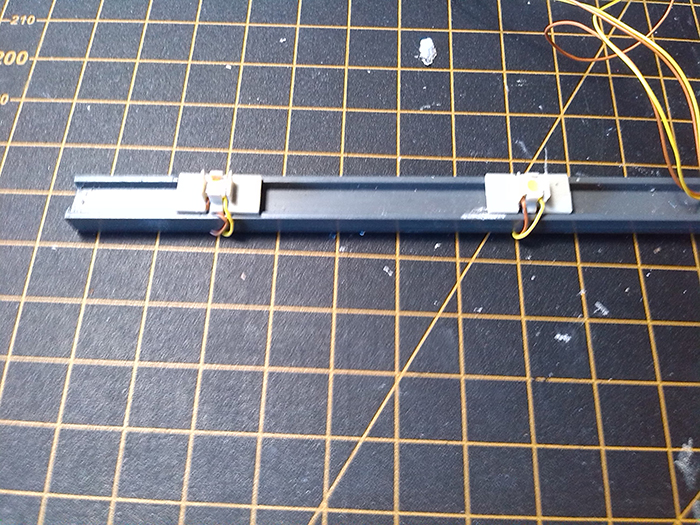
Next up was the interior lighting. A piece of Plastruct H section girder was cut to size, and two more of the Viessmann VN6046 LEDs were glued to this. The wires were then run along the top and through a hole into the shop part which, as this was to be screened off, gave plenty of room for the wiring connection to the underside of the layout when the Service Station is in position.

Finally, the front wall and doors can be fitted, and the roof put in place.
All that remains is for the decals to be added, which for our shop layout are being sourced to be in the 1970/1980s period. I hope this has given you a few ideas on adding another scene to your layout.
Happy Modelling
Martin