

In this follow-up article, we'll cover the next stages of painting a figure – various methods for enhancing realism. This is mainly relevant for the larger scales 1:43 (O) and upwards as the smaller scales do not need this extra effort and in scales like 1:87 (HO) they may actually look worse.
Once again I'm using the Preiser and Pola 1:22.5 (G) figures as these take most benefit from the extra effects.
To make the stages easier to follow, I've used the same figure in all of the shots for a particular technique.
You don't have to use every technique on a figure – on the contrary doing so may make the figure overdone and messy. In addition some colours only need one method to be used, this usually depends on how light the base colour is. For a light base colour, darken the shadows, for dark colours you brighten up the exposed areas.
Here we go...!
The first figure is one of the wedding guest models available in both Preiser and Pola's range. The model is delivered in a basic paint scheme, the main areas have been painted but no detailing has been done.
As she's wearing a pale yellow dress, we'll darken the shadows with a wash. A wash is painted with lots and lots of water added, acrylic inks can also be used, again watered down. You must add enough water to lower the covering power of the paint – the lighter the base colour, the thinner the wash should be. Be careful doing this, it is much better to make the wash too thin than too thick. Why? A thick coat may ruin your painting whereas you can always use a second wash once the first has dried if the effect is not pronounced enough.
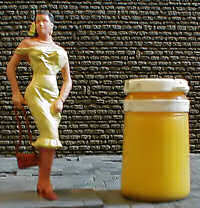 The picture shows the figure and the yellow ink to be used. A standard brush was dipped into the ink, and then the brush is placed firmly on the yellow base to squeeze the ink from the brush leaving a blob of yellow ink on the model. Next, the whole head of the brush is dipped in the water jar, and this water is then used to spread the ink across the whole yellow area. The wash will naturally build up in the folds of the model. As the ink dries a dry fingertip is used to remove any excess ink from the raised areas, but don't use tissue as this is often too absorbent and will draw too much ink from the model.
Once this coat is thoroughly dry, tiny amounts of neat ink are run into the deepest folds using a tiny brush. If the model is still damp when you do this, the ink will run into any water left on the model, spoiling the effect.
Next we'll move on to the handbag and shoes. These are dark in comparison to the light dress, so we'll highlight the raised areas. The factory finish on these areas was rather blotchy, so to achieve a good base colour these areas were repainted with a mid-brown colour. There are two methods used for highlighting, both of which have different uses. The first is of course dry brushing - this is more suitable for large areas as it is a rough and ready technique. As the bag and shoes are small sections, and close to the freshly painted dress, we'll use the second method, paint highlighting – for either method a lighter shade of the base coat is needed.
To achieve this you can either mix a tiny amount of white to the base colour on a palette or paint over the base with a lighter shade of the base colour – this needs greater care to be taken. When considering the right shade, you must make sure the colour is the same but just a lighter shade. The picture of the green paints is a good example; we have a blue-green on the left and yellow-greens on the right. At the top are the flat greens, khaki type colours with a bit of brown-grey in the mix. Obviously using a light yellow-green to highlight a darker blue-green just looks wrong!
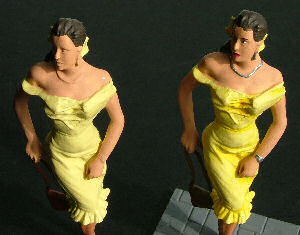
The picture shows the before and after shots, before being on the left and after on the right.
Both bag and shoes have had a light brown leather colour painted over the mid-brown base with a small brush, leaving a small gap near the recessed areas so that the dark brown shows through. Lastly, a very light brown is carefully brushed over the edges to pick out some more detail. For most models, three or four shades of the same colour works best, less than this means the effect is too subtle, more makes the model too exaggerated.
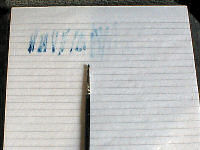 On to Dry-Brushing, as mentioned before, this works best on large areas due to the more vigorous brushing required. Using an old dry brush, dip about half the length of the bristles into the paint, then repeatedly draw the bristles over a piece of scrap paper until hardly any paint is coming off the brush – see photo.
Now briskly draw the brush across, not along, the folds and ridges on the model, the paint left on the brush will adhere to the raised areas. The more pressure you exert on the brush the more heavily the paint will apply. By using a second lighter shade and by being gentler with the brush you can build up the highlights in much the same way as the paint highlighting method.
These have limited use for railway figures, but you may find uses for some of these if for example you have a military band, punk rockers or flash traditional costumes. You must be very patient to achieve these effects, it takes a long time to get good at doing these.
The models pictured below are from my war-gaming days, but they show exactly what can be achieved. Left to right, camouflage patterns, rainbow Mohicans, industrial stripes and check patterns.

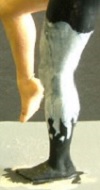
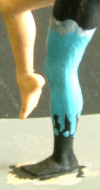
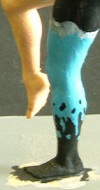
To get you started let's go through the stages used on the two ladies from the first article to create a sort of flame effect. A variety of colours were considered before I settled on the ice blue, the white and grey were added later. The pictures on the right show the various stages, with the completed effect at the bottom.
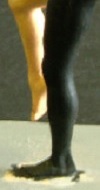
Firstly the entire model was painted with the flesh colour. This paint has very good covering power and serves as an undercoat as well. The black is the second colour to be applied. So far straightforward, now things get more time consuming. If we paint blue directly onto the black area, the blue will be darkened by the black beneath - so we use white paint to provide a good bright base. The flame effect is going to stop halfway up the lower leg - using a small brush held at the same orientation as the leg, make some small wiggly stripes downwards, moving around the circumference of the leg as you go. Remember that flame is a very random effect - make some of the stripes longer than others, and try not to make the stripes too straight or you will just end up with a zig-zag pattern. Don't worry if some of the wiggly stripes are a bit thick or blobby at this stage, we will neaten up things shortly. When you have a ring of stripes running all the way round, paint the rest of the leg down to the foot white.
When the white is dry, the whole area is overpainted with the light blue, taking care to stick to the white areas where the black and blue meet. To neaten up the join between the two colours, the model is then turned upside down and black paint is used with a small brush to thin some of the thicker blue stripes. This will also cover any unsightly white that may be showing under the edge of the blue.
This same technique is then used over the rest of the model with different colours. The blue areas take the longest to paint as two paints are being used, the white undercoat and the blue topcoat.
If you are trying to achieve a more conventional flame effect, just use red paint instead of blue. These effects always work best against a strong neutral background - black, white or grey.
Camouflage effects are reasonably straightforward unless you are recreating a specific real world camouflage scheme, normally I just make it up as I go along! The most common style is the leaf style patterns but camouflage can also be composed of checks (urban warfare) spots etc. Three or four colours seems to work best. Paint the whole model with a single colour undercoat. The whole camo effect will be painted first - this saves you from having to repaint any details that accidentally get covered whilst you are doing the camo.
Colour fades or sprays like the mohican are quite difficult to achieve - the one pictured used virtually all of my pure colour paints. Lay out your paint pots from red to violet, like a rainbow. Now remove any that are not pure colours - all of the flat olive greens, rusty reds, grayish blues etc. The mohican was painted with a white undercoat to ensure the colours show at their brightest. Starting at one end, paint a thin a thin stripe of red from the base of the hair to the tip. Now using the next red in the sequence, another stripe is run along the hair, a fraction further along. Continue through the colours until you reach the other end. The more different paints you have the smoother the effect will be, but this obviously takes much longer. This is quite a good technique to try, even if you just paint onto a piece of paper as this will get you used to the range of paints you have and where they sit in the rainbow.
Industrial warning stripes are a very dramatic effect, the key here is which direction the stripes run - never run them parallel to a straight edge as this will almost certainly make your stripes look wonky, no matter how good they are. The section covered on the model shown is effectively a barrel, so the stripes are run from top to bottom on the diagonal. In order to keep the stripes running parallel, paint a short section of several stripes at a time, if you start by running a single stripe as far as you can you will probably find the stripe has wandered from straight when you get all the way round. Black and yellow are the most common particularly for railway models, but have a go with red and white as well.
Check and tartan patterns are similar to the industrial effect, but takes a very long time - save this for your absolute best models. This does require a steady hand to get the squares to stay square, try practicing with large checks on a piece of paper first and gradually reduce the size of the squares until the squares are coming out like blobs or circles, this will show you how small a pattern you can create. Golfers are the ideal figures for this sort of treatment - if you cant get a check pattern you will still be able to do tasteless tartan!
The previous article is Painting Figures Part 1.