 CRAIG WEATHERLEY shows us how a little bit of weathering can really enhance a model.
Since we started stocking the Herpa range here at Gaugemaster, I have been so excited to see and purchase many of the aircraft in their range. Being both a railway enthusiast and an aviation enthusiast, the addition of this range really didn’t help my bank account!
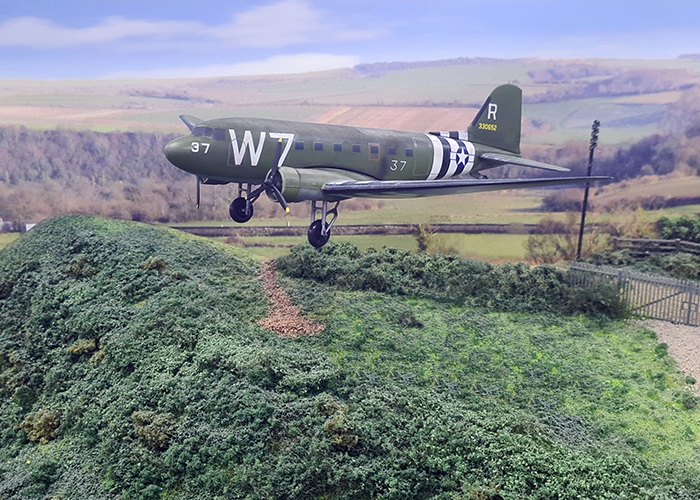
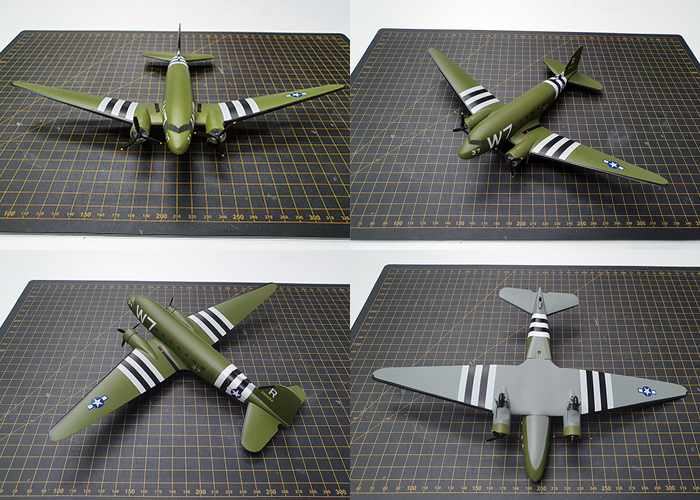
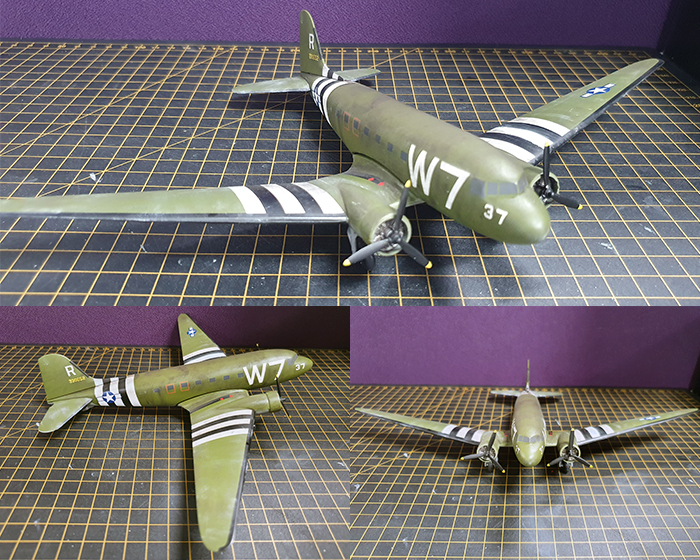
Herpa produce some amazingly detailed products which are incredibly detailed and well worth their weight, however on the flip side they also produce the Snapfit range of aircraft which many of you will have seen featured in Flight Lines before. The range is well priced and comes in a box where the user can have hands on experience building an aircraft without the use of glue, paints, or knives and taking a matter of 5 mins to assemble. In this article I will be going through weathering their US Army Air Force Douglas C-47A Skytrain, which was my first purchase from the range when we first began stocking it, with the aim to give it a more realistic look like it would have been seen during D-Day 1944.
For weathering this model, I used:
So, let’s get started. The first thing to do is to take a look at the model and assess where the darker patches are going to be and where the air flow would influence the dirt lines etc. The easiest way to do this is to use photo references online or in aviation publications.
Once you have assessed the model you are ready to start the weathering process. Here, I started by simply dry brushing the black weathering powder onto the underside of the model and once I was happy with an area, I'd use a paper towel to wipe away the excess and smudge the powder to create a toned-down look to the plastic.
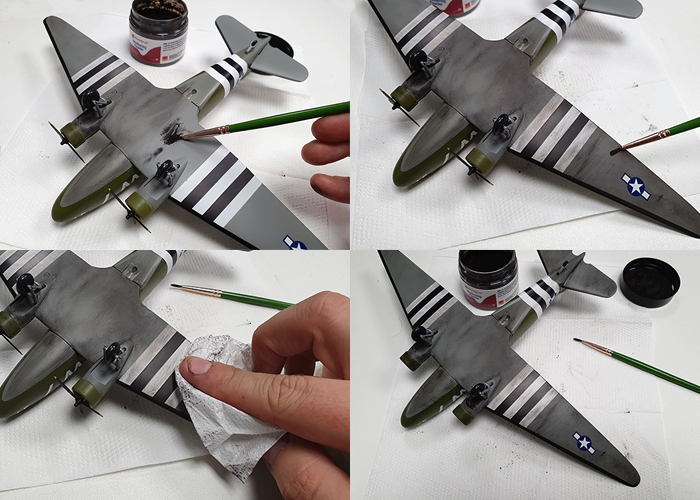
Next, using both the white and smoke weathering powders, I highlighted some areas to contrast with the black already applied. Just keep in mind you only need to put a small amount in certain areas as you still want the black to be the prominent colour. These were also blended using a paper towel.

For this model I then turned my attention to the top of the wings and the main fuselage. The same technique that I used for the underside of the aircraft was applied here.

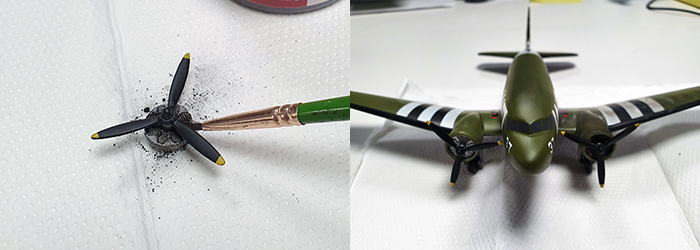
The engines get weathered using the black to dull down the silver plastic.
After you have finished the model, you need to seal in all the weathering powder to stop it wearing off whilst it is handled. Here I used an Enamel Matt Varnish spray to lock in the powder, but also to give the model a less shiny finish.

And there we go. This is a quick and simple process to create an even more realistic looking aircraft for your collection, and at very little cost to.
For more modelling hints and tips, check out our Railway and General modelling archive of articles here.