

 JAMES HICKMAN shows us how to make the most of your UNITRACK.
I have worked in the shop here at Gaugemaster for over ten years now, and out of all the ranges that we have started stocking in that time my favourite has to be the Kato UNITRACK system. Previously I hadn't personally been a fan of the pre-ballasted systems out there, but when the Kato arrived my opinion changed.
For beginners, the Kato range is an attractive range to start out with - in N Scale especially. There are more radii than any other track system I have come across, and they are all simple to clip together. This allows the layout to be set up in very quick time (or taken down if you are so inclined). The wiring also clips together for analogue use and is easily modified for those using DCC.
The only real criticism I have come across when speaking to customers, is that some think it looks too unrealistic. That's because the track is very realistic - if the track being modelled has never seen a speck of dirt. My answer to that is simply it's what you do with it. I use this track system on my layouts and have recently been weathering and making it look more like a working line. These quick tricks will hopefully show you how change the look, so it blends in with any environment.
Before weathering the track, it is best to fix it in position. Personally, I prefer glue as when finished, there are no track pin heads visible on the top of the track. This is a more permanent move, so if you don't wish too, you can still pin. On the underside of the track are support pins. These can have a small microdrill run through them to create the holes for the track pins to go through. Once the track is laid and the electrics are up and running, the weathering can begin.
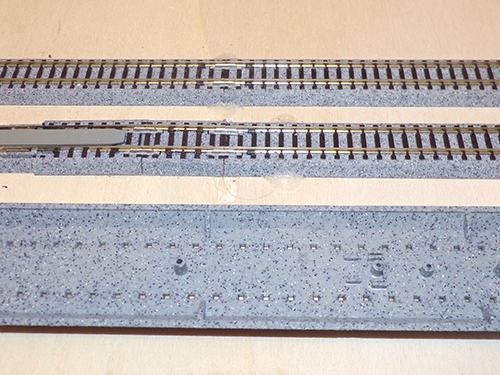
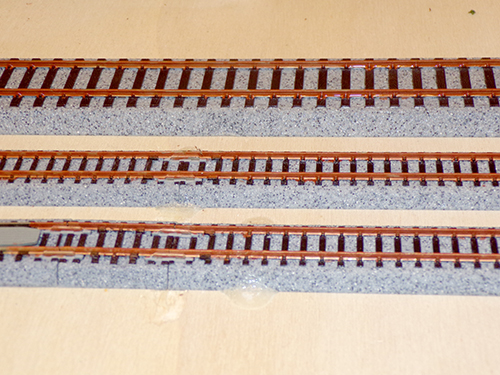
The first thing I tend to do when weathering the track is to paint the rails. The example above used RM404 Railmatch Light Rust Enamel paint to give the rails the rusty look. I personally like this look, but others may prefer the RM406 Railmatch Sleeper Grime for a more muted brown colour. This is all dependant on your personal choice, but layouts based in the older eras would be more weathered with black coal etc, whereas the more modern layouts would be a lighter brown coming from general grime and dust. Here I used a AXG4231 Humbrol Palpo 000 brush for added control.>
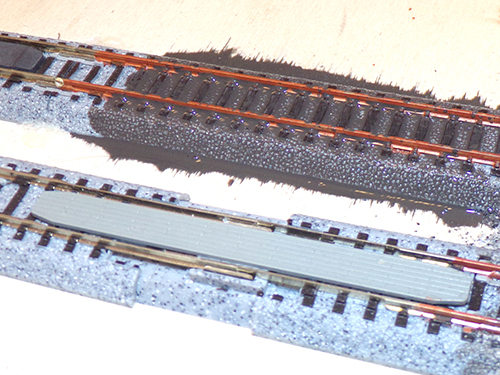
This is where it begins to get messy, it's time to start the washes. I began with a mixed wash of a mid-brown and a black, mixed to the consistency of milk. This was then gently applied to the track. Then I went for a darker black. This is to emulate the areas where fired up locomotives would stay for a longer period, with steam and soot covering the rails. For more modern layouts and out of town lines, a lighter brown, sleeper grime, or break dust colours would work very well. Once the wash had started to dry, I removed some of the excess off with a paper towel.
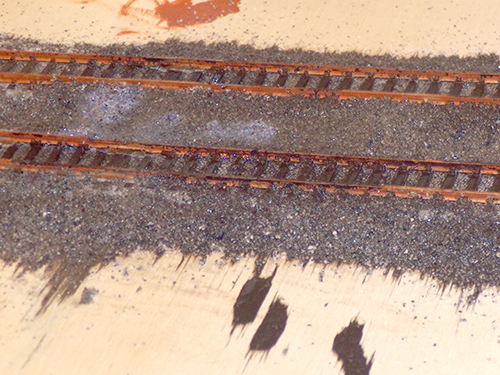
Next, I added the ballast shoulder. To keep in line with the rest of the range, Kato's track features the same ballast shoulder down the length of all the standard sections. I find that in most situations it would never be like that, so decided to add some extra ballast along the edges of the track to roughen them up. At the same time, I added a quantity of the ballast to the centre between the two rails, this is more common in yards and station areas. I placed the ballast in position and applied DLAD-75 Deluxe Materials Ballast Bond. As this was drying, I added another wash, this time thinner, to be pulled down through the ballast with the glue.
It may seem strange that I washed the track prior to the extra ballast being added. This was simply so that there was one wash already in place. Once complete, you will find the areas where the locomotives run is naturally darker as it has had a second coat when the same wash is applied to the track and ballast.
When it comes to points there is one simple rule; avoid the blades. When painting it is always good to make sure the layout is fully working and electrically sound before continuing. Then simply mask off the mechanical parts of the point and you are ready. Although you may be confident on where to paint, it is always a good idea to stop and check there are no parts of the point that shouldn't be painted still visible, you don't want to be having to replace a point this late in the building process.
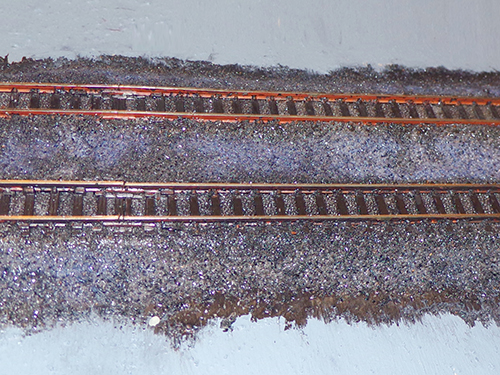
The image above shows the result. While waiting for the glue to dry I have painted the surrounding area grey, blending the board with the ballast. Next you just need to grab your trusty track rubber and clean the tops of the rails of paint. Once it has all dried and the rails have been clean, you are there. Keep in mind for a more recent placement of real track, the weathering will be lighter than those of a well-worn area. You could easily also go further and add grass and small plants to mimic over grown sidings or tone the weathering down a bit with some matt spray and add some grass between the running lines.
I hope that has shown you how you can disguise the uniformity and uniform look of the Kato track, and maybe persuaded some of you to give the Kato track system a try.