

 JAMES HICKMAN shows us how to add a touch of winter to your layout.
A long time ago, I began a series of articles about the different seasons, for example Autumn Scenes. Due to other projects and products becoming available, for example the Train Tech Smart Screen: articles Part 1 and Part 2, I have been unable to carry on that series - that is, until now. This project looks at creating a winter scene which could be part of a whole wintery layout, or a nice diorama for the winter period. Written in two parts, this first part will cover the creation and build of the scene and Winter Scenes Part 2 (in the next issue) will cover the scenic covering of the board.
We tend to feature a lot of modelling projects based in OO Scale, however for this project I am modelling in N Scale. This makes a change for me as I haven’t modelled in this scale for a while and becomes interesting for me when I try to bring the same level of detail you would find in an OO Scale model into N Scale. That said, this project would look just as good and be just as easy in OO Scale too.
The baseboard for this project is a thin plywood board with a small amount of bracing. This is perfect for this project; however, a more substantial base would be needed for a permanent layout.
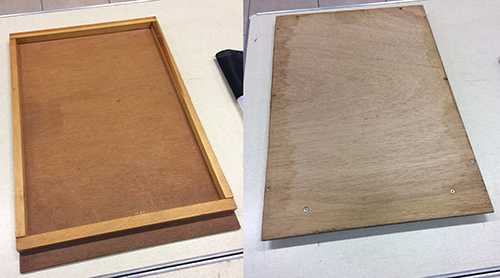
The Board before work begins
The first thing I started after choosing the baseboard was to construct the buildings for the diorama. I decided on an idyllic country scene for this piece, and the Metcalfe MEPN926 Parish Church and the Metcalfe MEPN155 Workers Cottages were the perfect choices.
I built these kits following the enclosed instructions, with a couple of deviations. From previous articles, for example on Modifying a Metcalfe Stable, you will remember that I do have a fondness for interiors, and even in N Scale this is no exception. Sadly, there is nowhere near the amount of interior detailing available for N Scale so for the workers cottages I did things a little differently.
As the instructions suggested I installed the spacers behind the windows and fitted curtains. Instead of coloured pieces of paper, I found some curtain designs online and printed these off in the appropriate size, this gives a bit more realism to the look of the building instantly.
From here I also found some pictures of room interiors online and scaled and printed these off too. I was careful when selecting my images, that there were no windows in the photos, as we would be viewing the images through the windows of the building.
These were then stuck into position behind the windows in a C shape. This was done to give a greater perspective of depth to the room. It also means there was no ugly fold lines across doorways too.
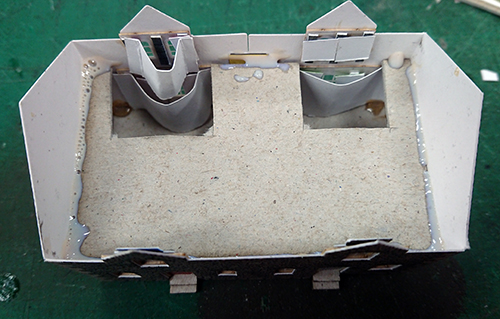
The Internal Structure of the Houses
You will notice in the above image that the upper floor has been fitted to the building. To do this, the floor had to be modified by removing two sections, to allow the interior graphics to fit. This was cut out using a Scalpel. Extra DLAD-57 Roket Card Glue was used to secure the floor as some of the strength had been removed. I have only used the interiors on the front of the building in this example as the rear of the building will not easily be seen once it is finished. To stop any unwanted bleeding of light through the back windows, these have all been modelled with their blinds and curtains closed.
You will also notice that the interiors do not have a top or a bottom to them. Aside from this being an extra fiddly job, the reason for not having this is simple. Once the interior lighting is fitted, this allows one single light to fill both rooms with light, rather than having to light each one individually.
The final addition to the build of the buildings was adding the light. One single LED Light has been added in the roof of each building. The LEDs used are manufactured by Viessmann under the reference, VN6047 Interior Lighting. These lights are perfect for mounting in the roofs of buildings.
The church did not get as much modification as the houses but did use the same lighting process. Two LEDs were included in the roof of the model. These lights are slightly hidden, and I wanted the final look to mimic the slight distant glow of candles for the internal lighting. Because of this, no lighting was needed in the wings of the church. This also negated the need for an interior as a small glint of light would be all that is seen. The front door of the church was cut out and set in the open position, with the same C shape backing applied, this time in solid black to hide any glimpse of the insides.
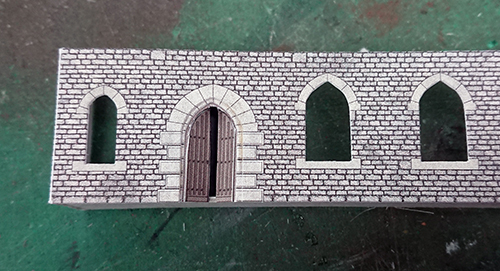
The Internal Structure of the Church
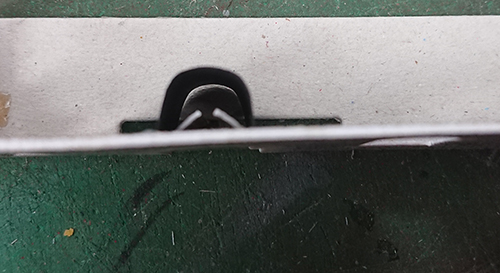
The ‘Interior’ break for the Church
Once the buildings were (almost) finished, they were placed onto the board to see how they looked. Their positions were marked onto the board before the construction began.
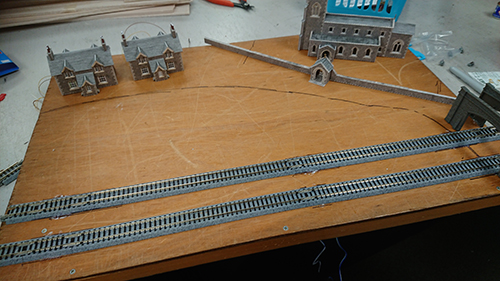
The Buildings are positioned on the board
To begin with, the most important thing to set in place, was the Track. For this I used some Kato UNITRACK as it has a pre-ballasted effect already attached which will definitely come in handy later. This was laid in position and glued. Feeder wires were fitted before the track was glued, allowing locomotives to run on the rails if desired.
Next the bridge was added. The Kato track was spaced to the correct spacing for the Kato geometry, and the Peco PENB-34 Double Track Road Bridge fitted over perfectly. Both sides were used, and the internal walls were cut from matching sheets of the PENB-40 Stone Walling. The road surface was constructed by attaching a layer of wood from the Balsa Wood Maxi Bundle.
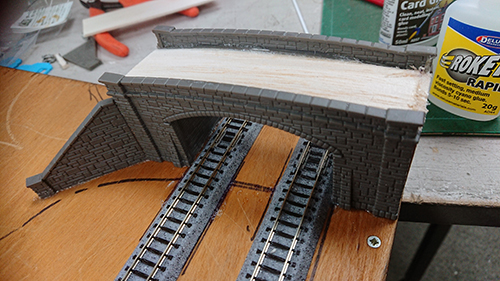
The Road bridge takes shape
Next, the rest of the back section was built up. This was made purely of balsa wood, again from the GM168 pack. This was glued into place, with Deluxe Materials DLAD-44 Roket Cyano Rapid, and the top was double layered to create an almost instant, solid, and durable surface on which to work. Holes under the locations of the buildings were then drilled to allow the wiring access to the underside of the board.
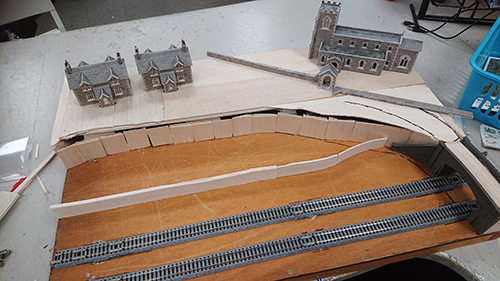
The diorama begins to take shape
Next the street lighting was added. Here I am using Viessmann VN6474 Nostalgic Park Lamp for an older look to match the rest of the diorama. These had their holes drilled an were glued into place.
Next it was time to create the slope between the upper section and the lower. This was done by Hot Gluing the Gaugemaster GM189 Wire Mesh onto the balsawood using the Gaugemaster GM655 Hot Glue Gun. This, again, was a quick and easy process with almost instant results.
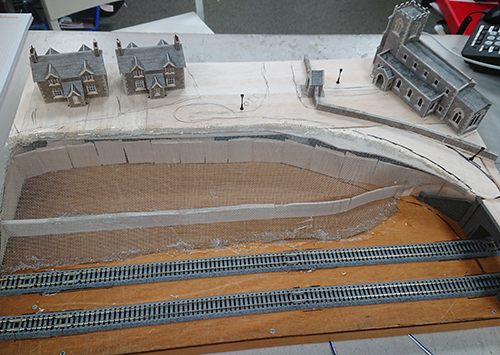
The Mesh is applied
Finally, for the first part of the build, the last thing to do is cover the mesh in Gaugemaster GM100 Mod Rock Plaster Bandage. This not only gives a nice smooth surface to work on, but also strengthens the mesh as well.
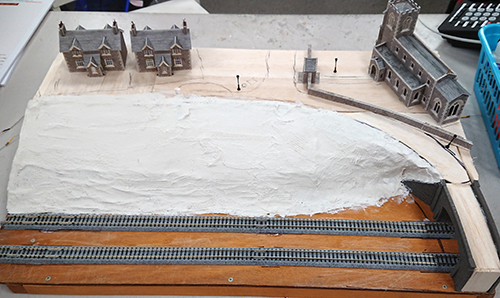
The Mod Rock Plaster Bandage is applied
Once this is dried the scenic work can truly begin, and that is where Part 2 will kick off!