
 JAMES HICKMAN looks at the different ways of laying your track.
Once you have Planned The Layout and Fiddle Yards and constructed the Baseboard, the next thing to do is to lay the track. Although it is very tempting to jump straight in and just start pinning the track down, there are a few things to think about before. As you do, the first thing to think about is how you will be fixing your track down.
The two main ways are track pins, or glue. I have seen other articles and attempts using double-sided tape before and, when I tried it previously, it did hold. I found this problematic when it came to ballasting, however, as the Ballast Bond that I was using soaked under the tape and caused it all to lift. Because of that experience I won't be covering it here, but I am sure there are modellers out there who have had more success and find it a viable method.
The quicker of the two methods is to pin the track down. The track pins can easily be pushed into a lot of baseboards with a Pin Pusher. This is preferable to a hammer as, unless you are using a little Hobby Hammer, a traditional hammer will be too large and can dent the track when the pin gets below the level of the rail. Some track pieces have holes pre-drilled for pins to be put through but others need them drilling out. This can be done with a Pin Vice and an appropriately sized Drill Bit. If you find the board hard to push into, small pilot holes can also be drilled first.
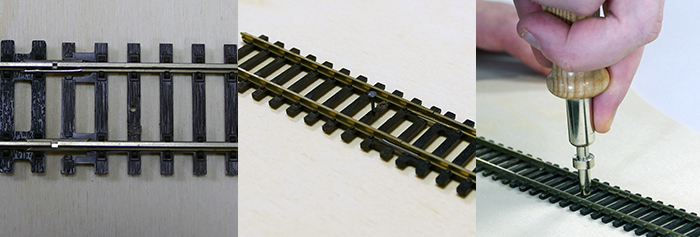
Above, we can see the pre-drilled hole in the sleepers and the pin pusher in use.
The second method is to glue the track down. This can be a bit more time consuming with drying times included and less forgiving as once the glue is dried it is harder to take up and adjust if required. That said, it does mean that you do not have to drill out pin holes, and you don't end up with unrealistic pin heads across your sleepers. If you do wish to glue your track down, then I would recommend Speed Bond, a fast strong white glue perfect for the job. If you are using track with pre-drilled holes, then Perfect Plastic Putty is a brilliant filler for filling them in. Don't forget to weigh your track down as it dries, to avoid warping or moving of the track. An old book or stack of last year’s catalogues would work well now that the big yellow book is no longer produced.
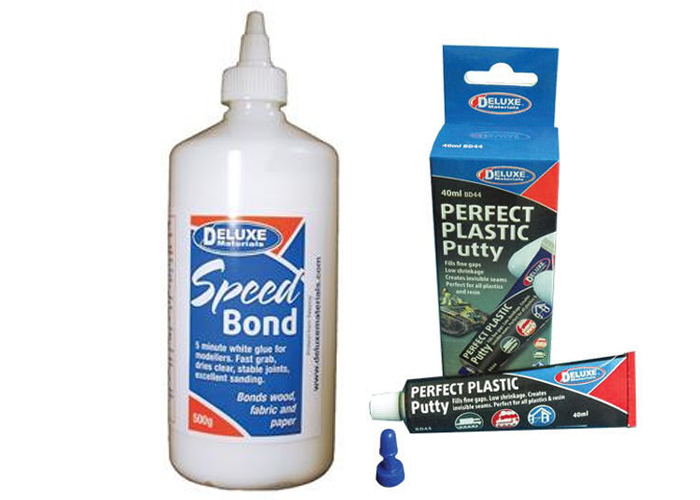
Both Speed Bond and Perfect Plastic Putty are perfect for use when gluing track down.
Once you have decided on the method you are going to use, it is a good idea to think forward to the wiring stage. Although I am not going to cover wiring in this article, I would always suggest a soldered joint to your track work as they are better over a power track, for example. I will look at this in a bit more detail in the following article, however, for Leadworth I am going to be using soldered rail joiners. These are available in the Gaugemaster and Peco ranges and, although this is more expensive that soldering the feeds yourself, it is a lot quicker.
The reason I mention this here is that if you plan on using soldered feeds then you need to put them in before laying your track. By no means do you need to attach them to anything just yet, all you need to do is drop them through the board, but you do need to do this as you lay the track. If you are using the Gaugemaster Wire; I would recommend drilling a 3mm hole though the board where each wire will go through, and feed them down. Now you can go about fixing down your track.
For reference, for those of you following this ever-growing series, the images below show the locations of the feed wires if I was wiring Leadworth up for analogue and digital wiring respectively.
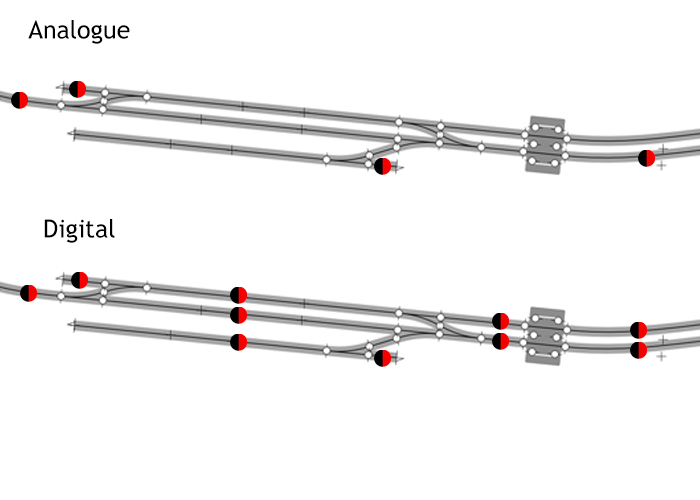
You will notice that there are more feeds on the digital diagram, this is to ensure all areas of the track are powered. If Point Clips are used, only one feed would be needed.
Don't forget to include any required insulating rail joiners, and it is also at this point you also need to drill out any required holes for point motors. If you are using under board mounted motors you will need a small slot under the locating hole in the tie bar, just as big as the tie bar throw. If you are using motors that clip directly onto the bottom of your point then a Hole Saw can be utilised. If you are unsure if you are even going to install motors, then I would still recommend cutting a slit now, as it can be ignored or filled in at a later date if not required, but it is not easy to drill out a hole from underneath without ruining the point itself.
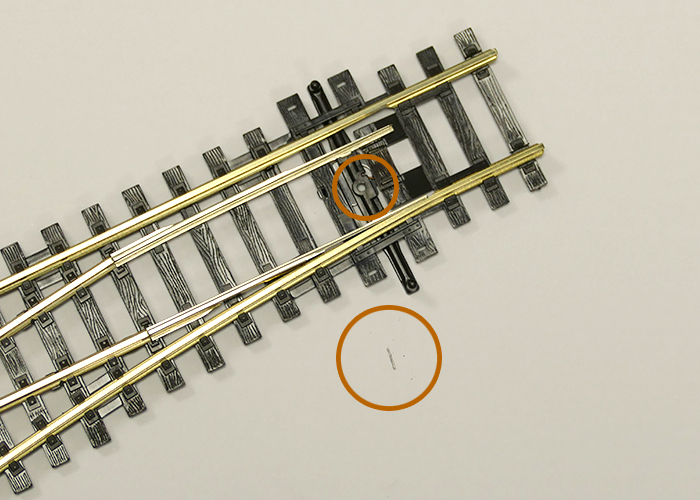
The tie bar hole is highlighted here alongside the size of slot required. This was marked using a pencil through the tie bar and moving it side to side.
Regardless of the type of track you are using, it is all ways good to use a track spacer, also known as a Way Gauge, to make sure you are spacing the track correctly. These could be the Peco versions or ones that are home-made to the required spacing. The Peco ones allow you to space your track for both 'Set-Track' and 'Streamline Track' spacing. This makes sure your track is always spaced correctly apart and will stop any clipping from rolling stock as it goes round the bends. I would recommend two regardless of scale to make sure that both ends of your track are correct, otherwise one end could narrow and splay, as seen below, while the position you are working on remains correct.
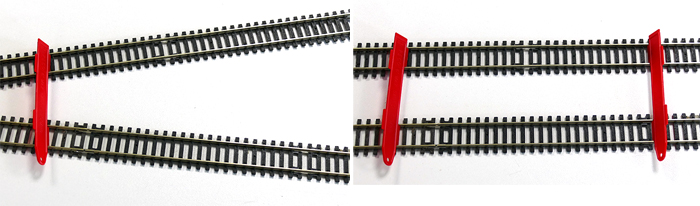
You can see above why it is beneficial to have two gauges.
If you are using 'Flexi-Track' then the spacers are a must. Another good thing to use here is the sometime overlooked Tracksetta. These are metal gauges that sit between your rails and allow you to push them round and form your curves to a set radius. You can easily swap them in and out if you wish to create transition curves, but again these allow smother running once the track is laid. There is even a straight one to make sure you have a crisp line along your platform edges.
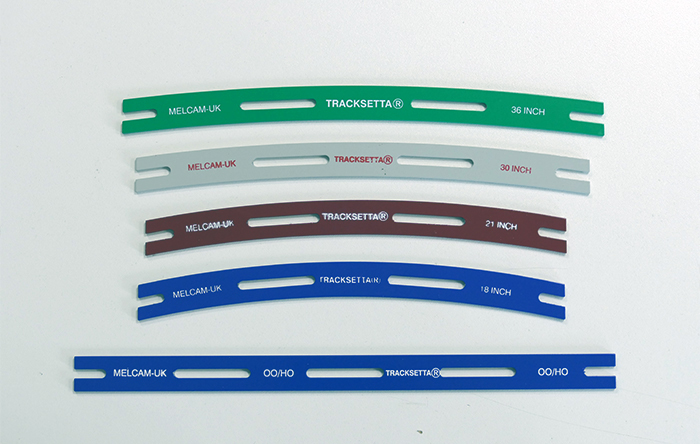
Just a selection of the Tracksettas available.
There are other versions of these on the market, but as far as I am aware, none are made from such tough metal. This material is handy as they do not easily break and can take a bit of a pounding from the slip of a pin pusher or belt of a hammer. They also have central holes to allow you to pin your track as you go.
At some point, whether you are using Set-Track or Flexi-Track, you will find the need to cut the track. A pair of Track Cutters always come in handy when laying track, as they are designed specifically for cutting track. Just be warned that they are not suitable for cutting point motor rods or other hardened metals, as this can cause the blades to shatter. A Mini Drill is also a good way of cutting track, especially when paired with a Mandrel and a Carborundum Disk. Both can also be purchased together in a handy pack. Make sure you wear protective goggles for this, however. This method is beneficial as it creates a more precise cut. Either way, a set of files are perfect for sanding the edge back and removing any burrs.
Finally, the last thing to think about when laying your track, is expansion joints. Normally when we lay our track, we like to push the joints together as tight as we can to keep the most conductivity between the rails as possible. That is fine, and always a good thing to do; just remember that you do need to leave the odd gap between your rails to allow for changes in temperature.
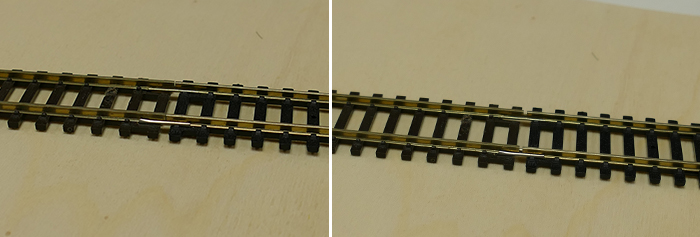
A tight-fitting joint to the left, and an expansion joint to the right.
Just like the real thing, our rails will expand and contract in the changing temperatures and this can cause buckling if the track is too tightly pressed together everywhere. To stop this happening leave a small gap between the rails every few feet. This does not need to be a massive gap and the rail joiner should still be firmly in place. If you are using flexi-track this could be done on every other joint for example. This will ensure that if a change in temperature does happen you are not needing to re-lay or replace any of your track.
Now that you are aware of these tips and some of the pitfalls it just leaves me to say; Happy Track Laying, and I'll see you in my next article on wiring up Leadworth.