
 JAMES HICKMAN rounds up this series with a look at installing a smoke unit in a scenic setting.
So we have it, the third and final part of this series. In Part 1 we looked at what smoke units are and what they do. In Part 2 we looked at installing a smoke unit into a loco, and now in Part 3 we look at places we can install a smoke unit for scenic effect, and of course, how to do it.
The most obvious place to install a smoke generator is into a chimney. Below I look at doing this, but before we do, where else could they go? My first, well second, thought would be where there is smoke, there is fire. A good few articles back, my colleague, Mark, produced a very effective looking Burning Camper Van, much to another colleague's heartbreak and dismay, and even at the time I thought to myself that this could be just enhanced a little by the addition of a smoke unit. The smoke would filter up and around the fake smoke the model already has and bring it further to life. Thankfully you wouldn't get the smell of burning 1980s fabrics with the model!
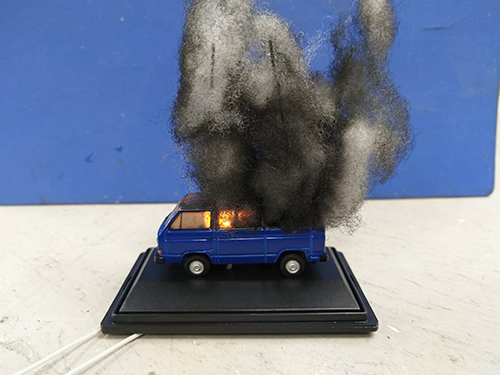
Mark's Completed Burning Camper Van
That train of thought led me onto thinking about other fires. The flickering fire unit Mark used could also be used to create a bonfire or a campfire, well any type of fire. Every where the lighting unit is used, it could be accompanied by a smoke unit. Vollmer produces a flickering campfire in the form of the VO43667 kit, and their promotional image of the kit is shown with a smoke unit attached underneath. They use their own smoke unit VO44112 but any large smoke unit would do the job; the Faller unit or the larger Seuthe smoke units would work a treat. This goes for the camper van scene too.
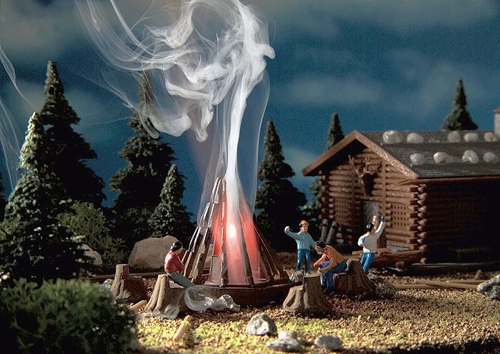
The Vollmer Kit pictured with the addition of a smoke unit below.
Aside from where there is an obvious fire, there are other areas where a smoke unit could be used. The Gaugemaster Kestrel Designs range of N Scale kits offers a couple of chimneys in the form of a Boiler House with a chimney, as well as a Factory with a chimney too. Both these kits would happily accommodate a smoke unit. A bit more 'out there' option would be to include a smoke unit in the outlet of an engine shed, for example, the Metcalfe Engine Shed kits. These kits mirror those buildings that were found up and down the country, and they feature vents on the top of the roof to allow locomotive steam to be released. Adding a smoke unit here above a parked locomotive would definitely add another level of detail to your model, just remember to not mount the unit in direct contact with the card of the kit.
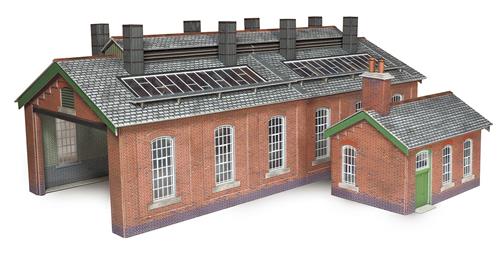
Just one of the Engine Shed kits that could become a suitable home for a smoke unit.
I could go on to highlight other places you could include a smoke unit, but there are just so many options; from a burning building to a BBQ, the list is endless. Most buildings with chimneys can, in some way, accommodate a smoke unit and this is what I have had a look at below.
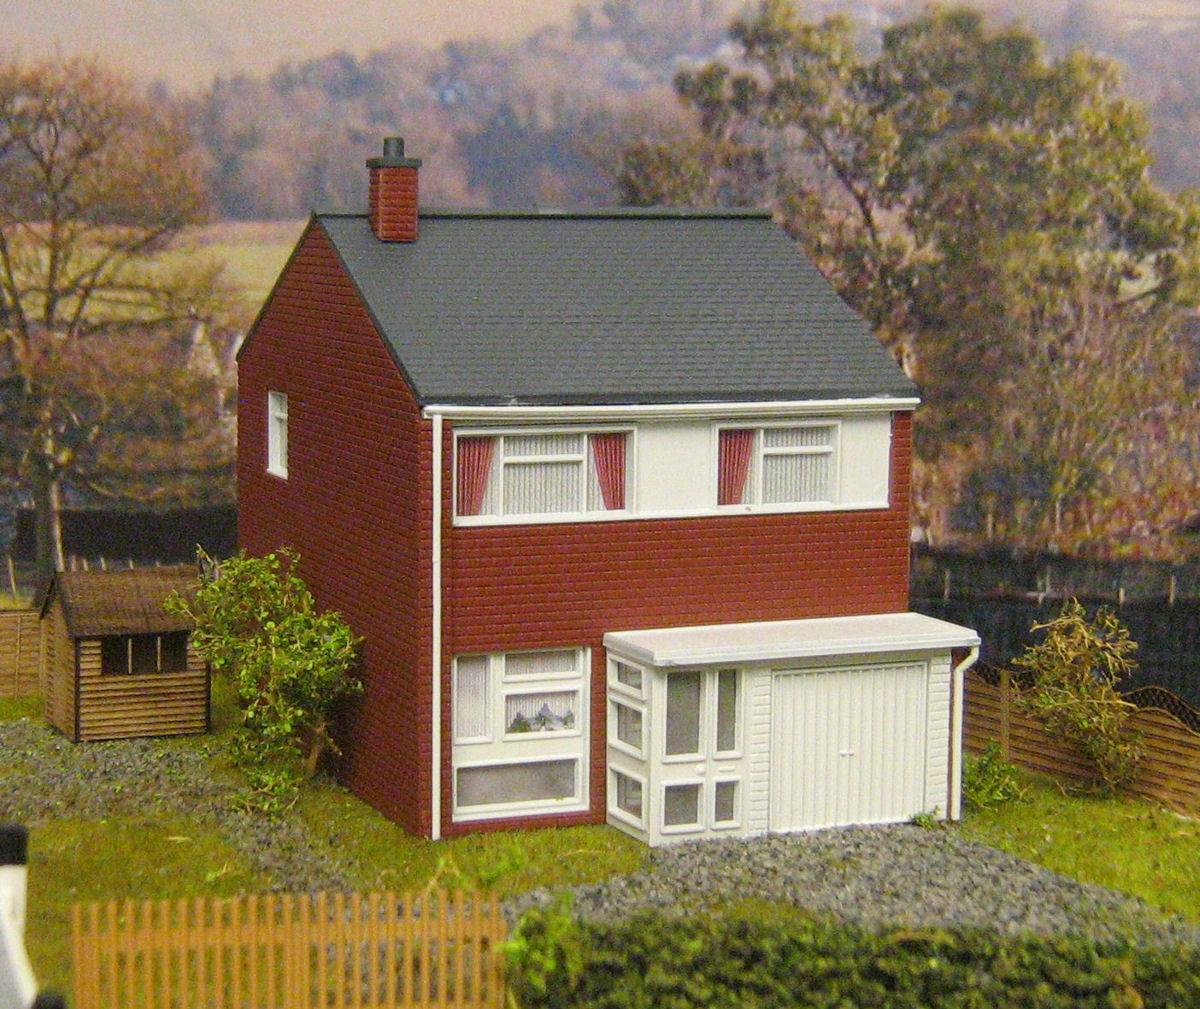
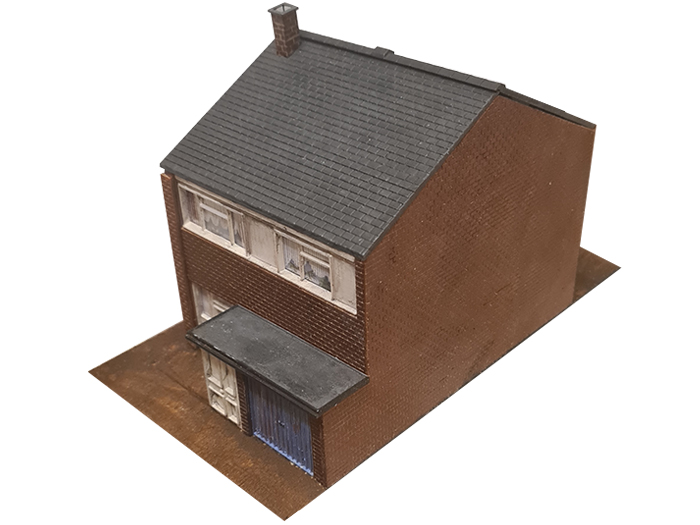
The Starting Point of the project.
The kit I am using here is the Gaugemaster Structures GM405 Fordhampton 1960s Three Bedroom House Kit. This is a nice little kit and it already features a chimney, so I thought it would be a good starting point for this project. To begin with, I built the kit as per the instructions up to the point of attaching the roof. As the building is going to feature in a future Right Lines article (Spoilers!) I painted the kit as I went along. Don't get me wrong, out of the box the kit does finish very well, but those of you familiar with my articles will know that I like to go the extra mile with my projects just to get in that extra bit of realism and detail.
The completed project, ready for the next article.
To begin with, I mortared and painted the walls in the same way Pat did in his article 'American English'. I also painted the rest of the house and weathered the finish using a variety of acrylic paints. Detailing was done in a similar manner to that of Terry in his article about modifying the GM405 kit this kit, available to read here. I intend on using N Scale ballast to create the driveway so I decided against using this for the garage roof, instead I simply went with grey paint with a dark grey wash on top of this. The garage door was also weathered down using a variety of techniques. You will notice that the image above of the kit is missing the guttering etc. This is simply because this will be added once the building becomes part of the eventual diorama. (More Spoilers!) That took me to the point of adding the roof.
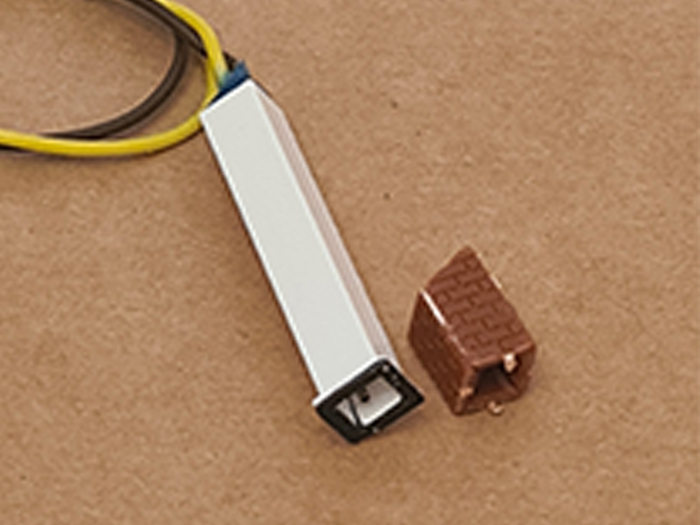
As I have mentioned, the kit comes with a chimney. Out of curiosity more than anything I decided to build this little piece and compare it to the Seuthe No117 Smoke Unit I will be installing. I was quite surprised that there was very little difference in size, save the depth for the well for the fluid. The Seuthe 117 unit is supplied as either a starter pack containing smoke oil and accessories or on its own as Seuthe No117E. The only downside of these units is that they are molded in smooth plastic, and unfortunately I didn't have any suitable brick Plasticard to clad the chimney, so I opted for a hand paint in the end. Although the end result is that the bricks are a little oversized, overall I don't think it looks too out of place.
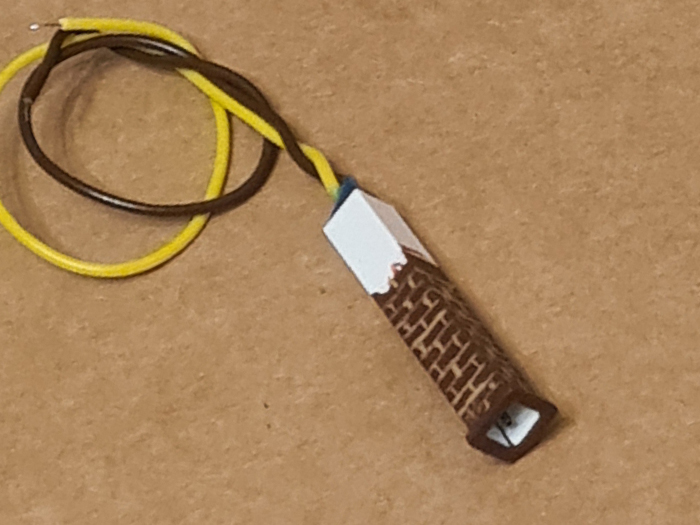
The painted unit.
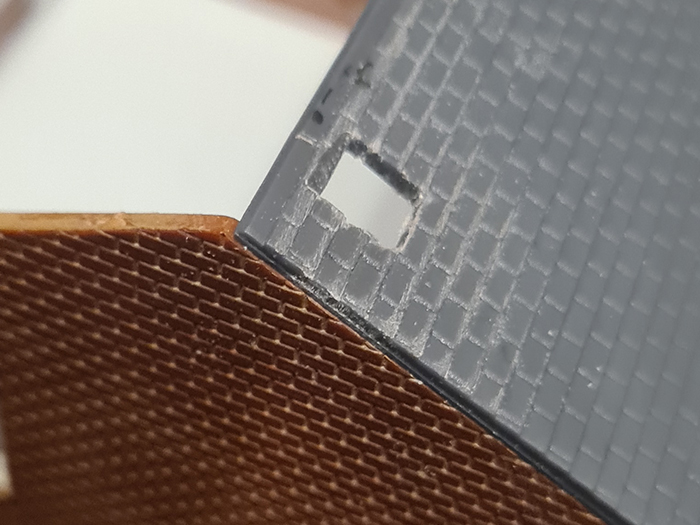
Once the paint had dried, it was time to look at how best to mount the unit. First I needed a hole to mount it in. The kit's chimney is designed to be glued onto the roofing tiles so there is no precut hole. I decided where I wanted the stack to be and using an Archimedean Frill and a scalpel, I removed the required area. The edges were then filed down using the Gaugemaster Needle File Set. A note here, we can't simply cut a square out to the same size as the unit. This would cause the smoke unit to align with the pitch of the roof, ending up with it pointing in the incorrect direction. Instead, we need to file the top and bottom of the hole to the opposite angle of the pitch of the roof.
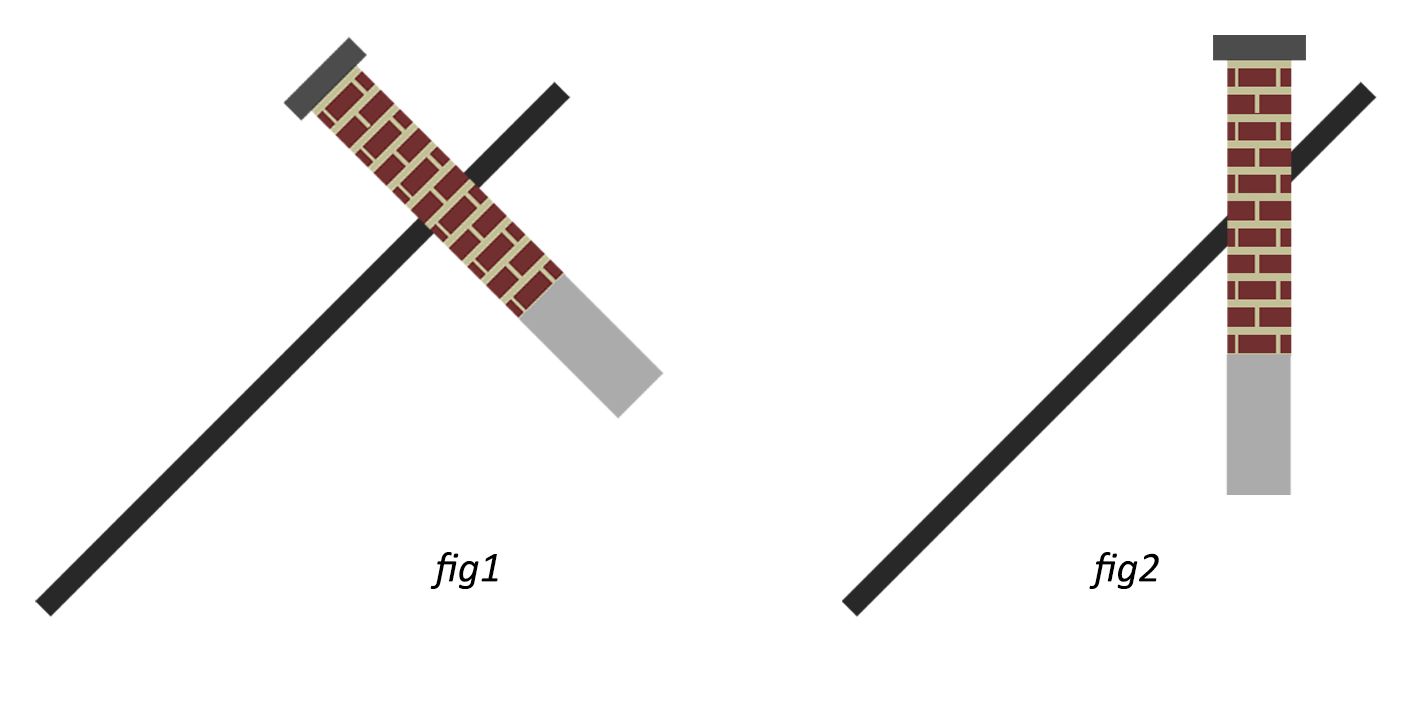
fig1. shows what would happen if the extra plastic isn't filed back. You can see more is removed in fig2.
From here the roof section was attached to the main part of the kit. This was done to allow us to set the unit in position and get it lined up correctly.
The roof glued into position
Once the roof was attached I test fitted the unit again. When in place I marked a spot directly below the unit before removing it and drilling through. This hole will allow our wires to pass through the strengthening floor. A second hole was also drilled and a switch was installed.
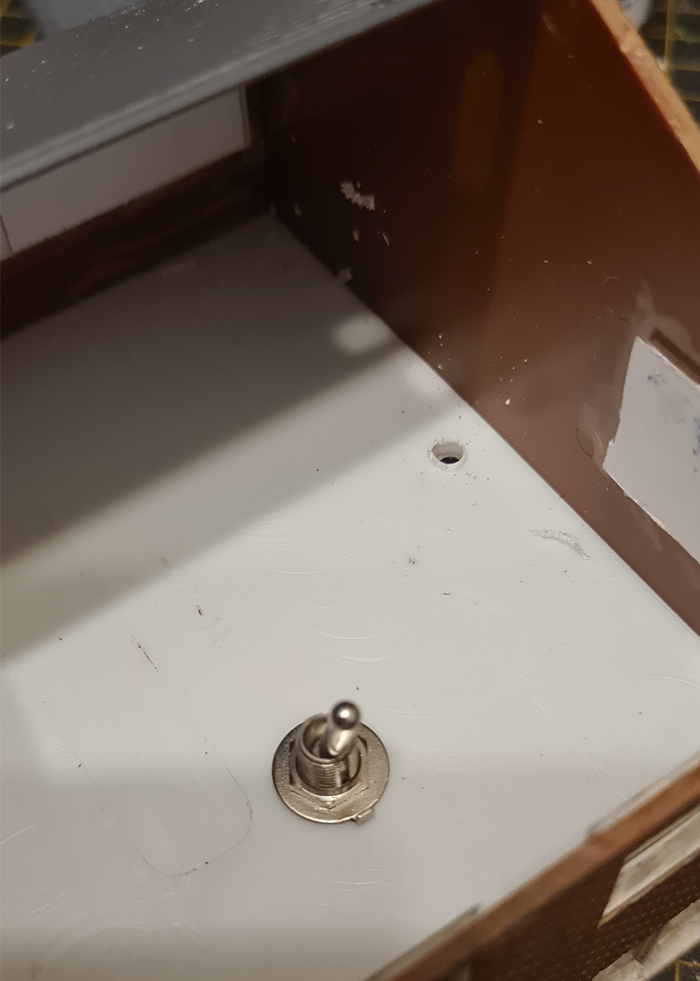
The inside of house once the switch as been installed
While the unit was in place, I had also measured the distance between the base of the unit and the floor of the building. Once it was removed, I cut a piece of hollow Plastruct and fed the wires through. This allowed me to mount the unit into the house, without the unit it falling through. I wanted to keep the unit accessable in case the unit burned out through prolonged use without fluid present, and I have to replace it. The unit was then set in position and the wires fed through to the appropriate holes.
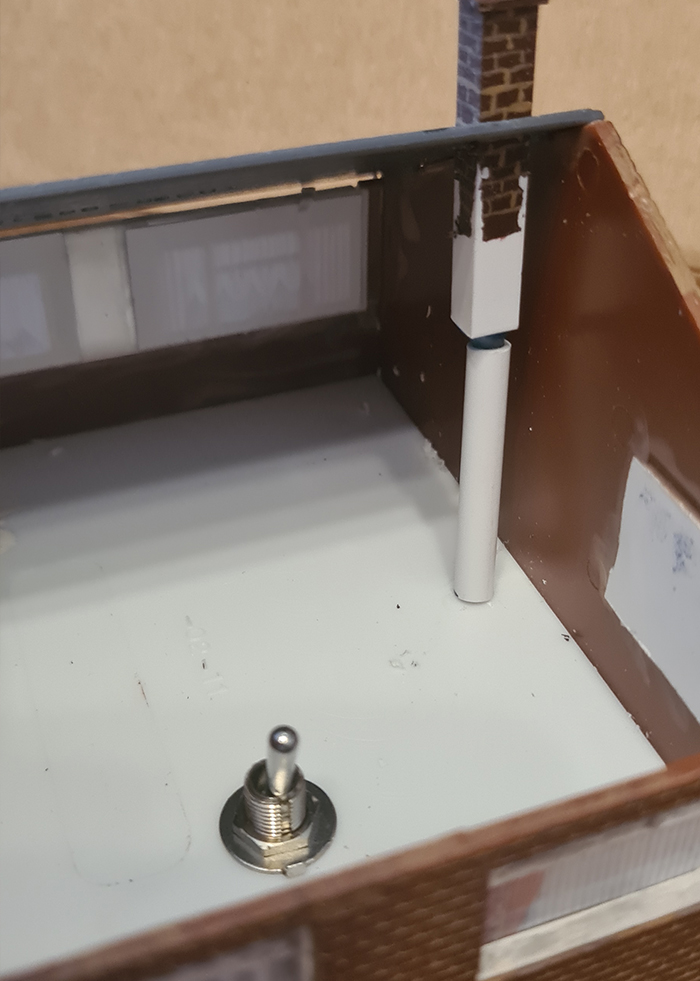
The unit fitted in place with the support.
From here the only thing left for the house was to finish the roof. The roof in the kit is designed to be glued in position, but because of the switch being inside the building, a removable roof was required. This was easy as well. All that was needed was to attach two small lengths of Plastruct from my off-cuts box to the bottom edge of the roof to stop it from slipping off. This was then painted to match the roof.
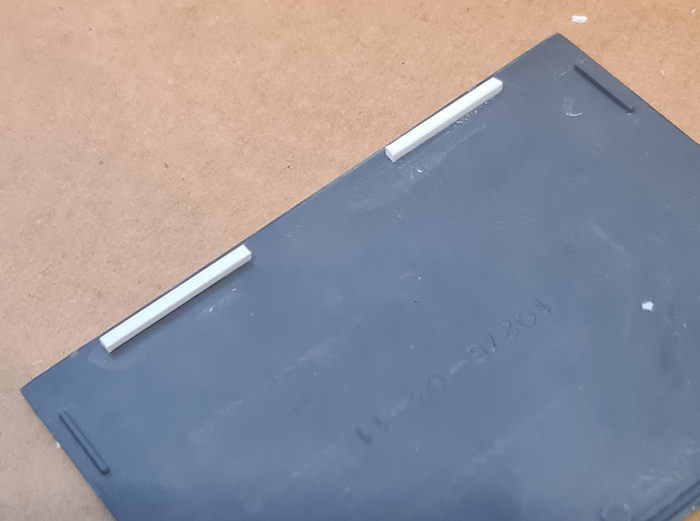
The extra supports for the roof section
All that was left for this installation was to wire the unit in. For this project, I decided to use a DPDT Center Off switch. Don't worry if that sounds confusing, Martin demystifies switches in his article, available to read here. There were a couple of reasons I went for this type of switch as opposed to the standard SPST On-Off switch. The DPDT switch has two poles which means it can switch two independent circuits. I plan on using the second pole to switch lighting on at the same time, without the need for a second switch. The second pole position also allows me to switch the lighting on without switching on the smoke unit if I don't want it to activate.
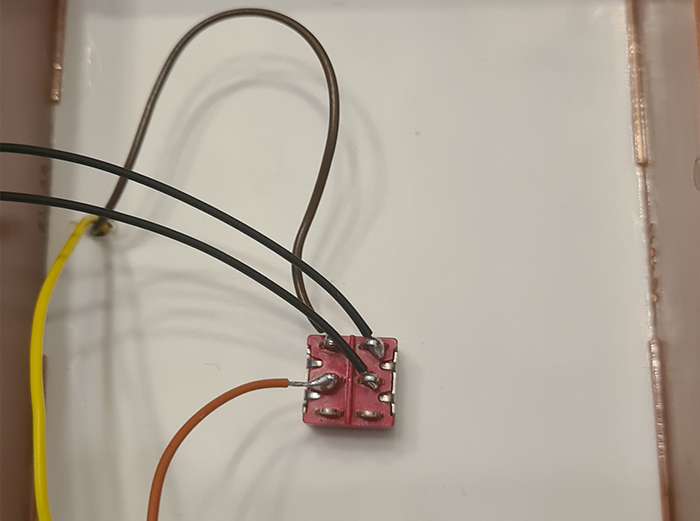
The beginnings of completion; the switch is wired up
If you were to do this yourself on your layout the switch could easily be located in a control point or mimic panel. The wiring for a standard SPST switch is shown below.
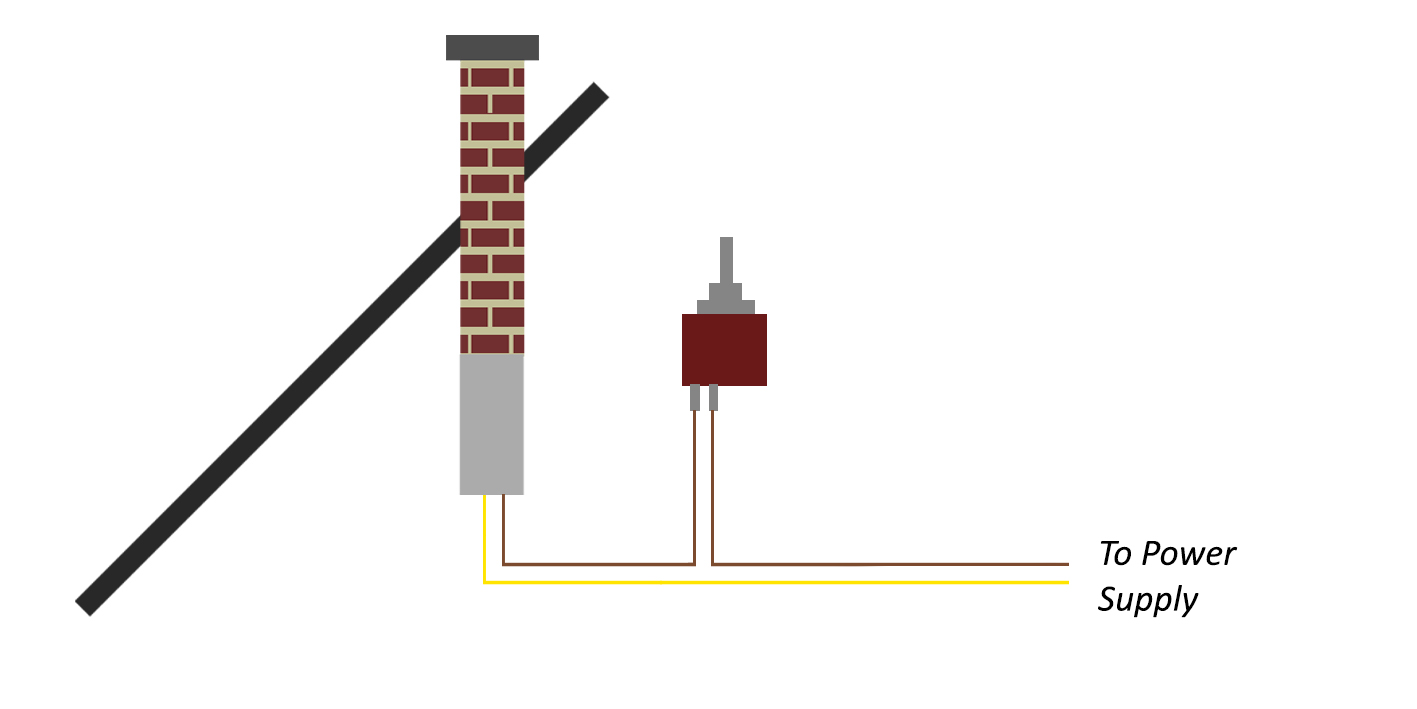
Wiring diagram for a SPST Switch
And there we have it: A Seuthe No117 Smoke Unit installed into the Gaugemaster GM405 kit.
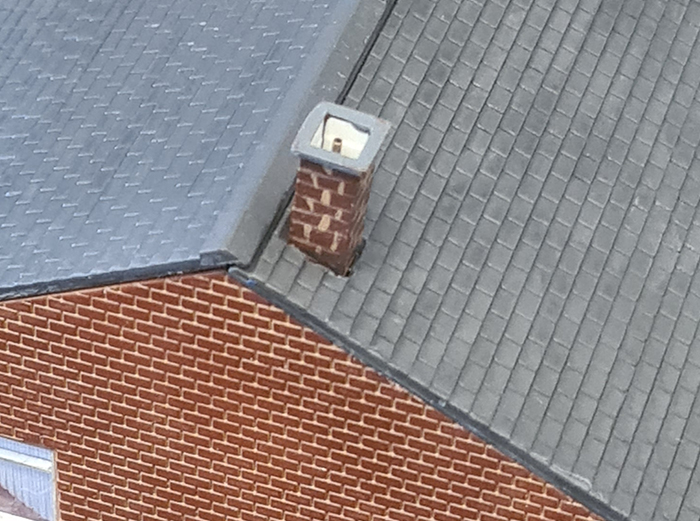
That sadly means that we have to chuck the sand on the fire as we reach the end of this Right Lines series. The building isn't completely finished yet, that will be done in a future article, but I hope I have shown you how easy it can be to install a Seuthe smoke unit into a building. If you already have a hollow chimney on your model I would look at using a different smoke unit and mounting it directly inside the chimney. All you would need would be an appropriate unit to do so.
There is a multitude of applications for a smoke unit, why not send us some of your ideas? We may even feature them in the next issue of Right Lines! Until then, I will be working on planting my building on my diorama (a final cheeky Spoiler), so I shall see you in a future issue.